• Skip to primary navigation
  • Skip to main content
frame 1 (1)

  • Home
  • Category
  • About Us
  • Contact Us
  • Reviews
  • Subscribe
  • Make Coffee In a Coffee Maker

    Blog

    Do you ever get tired of always fetching your favorite cup of coffee from a coffee shop every time you miss it? Or probably tired of making a terrible tasting cup of coffee, yet wishing that you could make one that tastes so good and refreshing like your friend’s, Susan. You even ask yourself what could be her secret ingredient yet you both use the same brand of coffee? Today, we will learn how to make coffee in a coffee maker? So, let’s start.

    Well, I know exactly what she might be using, and you don’t; a coffee maker. I know this because having the right ingredients and using the correct procedure helped me a lot. I find it cost-effective and time-saving to make my coffee in a coffee maker. It only costs me less than 10 minutes to a make a refreshing cup of coffee for myself or my friends whenever they are around. I no longer have to rush and queue at the coffee shop every single time as I used to before I got a coffee maker.

    What is Coffee Maker?

    A coffee maker is a coffee brewing system which offers you an excellent solution to quench your coffee thirst at the comfort of your own home or at work. All it takes is a few simple steps to make a delicious cup of coffee anytime you want. Probably, you have come across this equipment, or you already own one, but you lack enough knowledge on how to use it.

    These pro-tips will help you become an expert, and before you know it, your coffee making game would have already moved from a one to a ten. Here is a guide to everything you need and the procedures to follow to make that refreshing cup of coffee in a coffee maker.

    Things you will need To Know to make coffee maker

    • Get a Burr Grinder
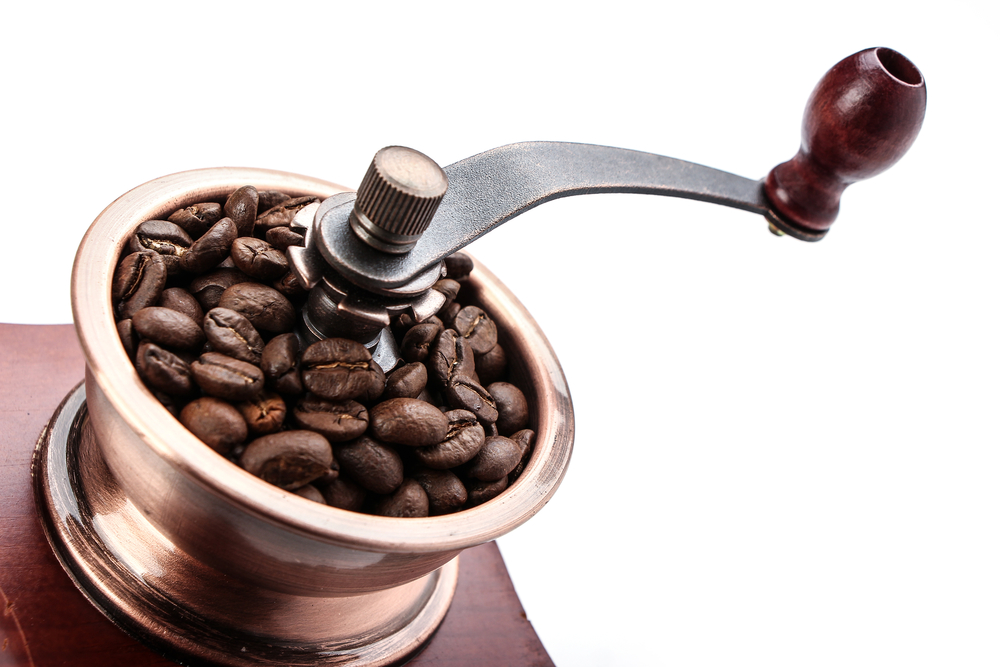
    Burr Grinder

    The best way to have a smooth and great tasting coffee is by consistently grinding the coffee beans, and how exactly do you do that? Use a burr grinder and ensure it that it has a hopper to funnel the beans down the grinding wheel. The results will be a fine and medium ground coffee. And there are eases to the way you can take a step to make a coffee with French press.

    There are still other alternatives if you do not have a burr grinder which includes; using a mortar and pestle to smash the beans, using the standard blender to blend them similarly to the way you would do to your fruits or vegetables, using a rolling pin to grind and crush the beans or you can improvise with a hummer. I would recommend getting a burr mill for easy and quick results, and if not, go for the blender.

    • Milk Frother

    Milk FrotherMilk Frother

    The best way to make latte milk is by using a milk frother. I would recommend you to get an electric one. It will make your work easy since all you will need to do is pour the milk in it, then press the button and wait for some few minutes for the end results. You can froth it either hot or cold depending on your preference.

    What if I don’t have a Frother, you may ask? There are still other alternatives which include blending the milk at a high speed, and if not, you can use a whisk to create the foam. The key is to use fresh milk for excellent results. The two alternatives are great but I would opt for the milk frother or the whisk as they both give faster results than using a blender

    • A Water Filter

    Water Filter

    The quality of the water you decide to use when making coffee matters for you to brew a tasty cup of coffee. You need to use filtered or purified water rather than going for water directly from the tap. For clean and good-tasting water, you can use a purifying water system. And coffee chokies recipe try it the most easy to make and deliciously.

    If you do not have the purifying water system, you can try other means such as using mechanical filters, a stove up distiller, you could improvise a charcoal filter, solar water disinfectant or even better; boil the water. I would recommend boiling the water as it takes less time and resources and you are guaranteed to get clean and purified water that will give you the best result.

    • Coffee Beans
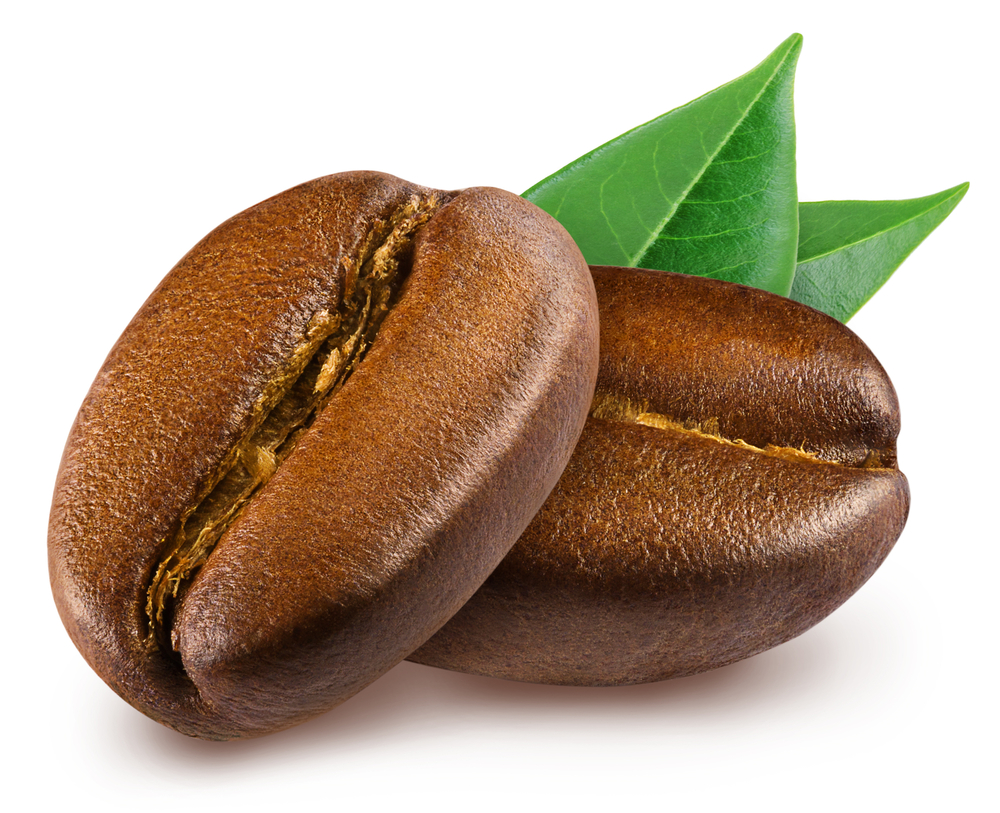
    Coffee Beans

    You may have all the other items in place, but without quality coffee beans, you will never enjoy that refreshing cup of coffee. Ensure to go for the best quality beans, if possible, always try to buy coffee beans from shops that roast their own beans.

    I know you may be wondering, “Why can’t I just go for the packed pre-ground coffee?”. Yes, you can, but I would recommend you go for the beans. When it comes to the food items, fresh things are always the best and coffee is not an exception. Moreover, the pre-ground coffee will already have lost its flavor and aroma, and if you do not want that, you better grind the beans yourself.

    • The coffee maker
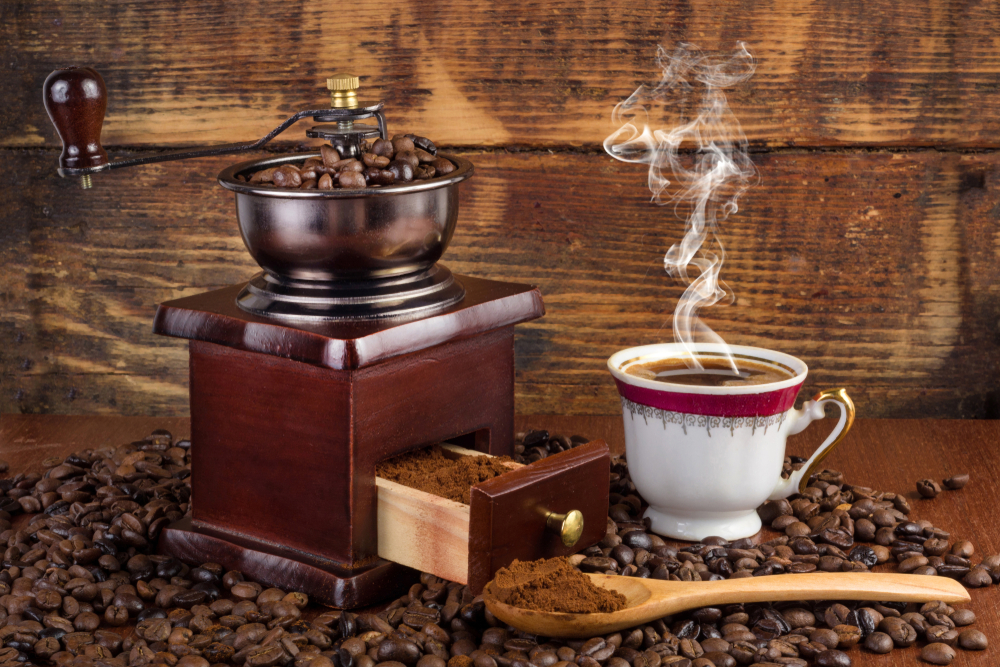
    Best Manual Coffee Grinder

    Now that you have everything in place, it is now time to get started, and you cannot do it without a coffee maker.

     There are other alternatives to make coffee without a ​coffee maker such as using a strainer, a filter, a saucepan or a French press. I would definitely recommend the coffee maker as it is fast and gives the best-guaranteed end product.

    These are the steps for making coffee with a coffee maker

    Step 1: Pour the filtered water into the reservoir

    As mentioned, you will need to filter your water first as this enhances the taste of the coffee. The amount of water you decide to use depends on the number of servings you want to make. Every cup of coffee will need about 180 ml of water and for a quick measurement; you can just use a measuring cup.

    It is important to note that you must avoid distilled or softened water in the process. If your coffee maker has serving lines which you can use for coffee measurement, then do not forget to add some extra amount of water due to the water that will be lost through evaporation.

    Step 2: Put a filter paper into the holder

    This is an optional step that you could only follow it if needed to. To do this, open the filter compartment on your system and check if it has a mesh filter basket. If it does, you will not need to add the paper filter, and if it doesn’t, you have to insert the improvised filter.

    However, the filter paper must go hand in hand with the shape of your coffee maker. Some filter papers take the form of an envelope while others are shaped like cups. The filter paper aims to filter the coffee grounds so that you can get clean coffee.

    Step 3: Add your coffee grounds in the filter

    This step is a significant determinant. You do not want to use too much or too little coffee. The taste of the coffee must be balanced. The amount you use will depend on the number of servings you intend to make. For each serving, you will need about one tablespoonful of the ground coffee, but if you love your coffee strong, you can go for two. Also, it is up to you to choose the way you grind your beans.

    You may opt for fine, medium or course depending on how you love it but as mentioned earlier, whole beans are more preferable than the pre-ground packed coffee

    Step 4: Brew your coffee 

    After putting the coffee grounds on the filter, slide it back to its position and close the lid. This is based on the design of coffee maker system that you have. You are now ready to brew your beverage. Turn on the maker and sit back as you wait for it to finish the process.

    The time taken depends on the amount of water you use, but in most cases, it takes a maximum of five to six minutes. How do you know that your coffee is ready?

    You should be keen on the dripping noise coming from the coffee maker, and once it has stopped, then you will automatically know that your coffee is ready. If your coffee maker is not automatic then you will need to turn it off immediately after it stops dripping. Most of the coffee makers automatically switch themselves off when they are done brewing. Remove the filter and get rid of the filtered residue.

    Note that you should be cautious when opening your coffee maker. The coffee is still hot which causes it to release hot steam, and if you are not careful, you could get burned. You are not going enjoy the coffee if you are in pain.

    Step 5: Serve your coffee and make a froth 

    That was fast, wasn’t it? Your coffee is now ready, yet the whole process took you less than 10 minutes to prepare. You can sweeten your coffee however you wish, but the simplest way to make it creamy is by using milk. If you are a sugar lover, you can add sugar or maple syrup.

    You should check the ingredients first to know if your milk has some sweetness in it so that you would not need to add extra sugar. For a perfect latte, serve your coffee, heat up your milk and using a milk frother, froth the milk or just use a whisk to give it a nice beat. Slowly pour your milk into the coffee while stirring, and there, you have your tasty coffee. If you follow the right instructions, it will turn out much better than the coffee you have been fetching from the coffee shop.

    Conclusion

    coffee maker.infographic

    What a simple procedure. I hope you loved it. What’s even better about making coffee in a coffee maker is that not only will you be making quality coffee from the comfort of your house but it costs you less than buying coffee from a coffee shop.

    Now that you know how to make coffee with a coffee maker, you can get started on how to make and drink your favorite cup of coffee as often as you want. This simple procedure changed my life. Ever since I learned how to make coffee in a coffee maker, I always make my coffee every morning and some extra to carry to work. I hope it changes your life and routine too for the better.

    If you loved this tutorial, do not forget to leave a comment on the comment box below, like and share with your friends and family.

    Filed Under: Best Lunch Ideas, Blog

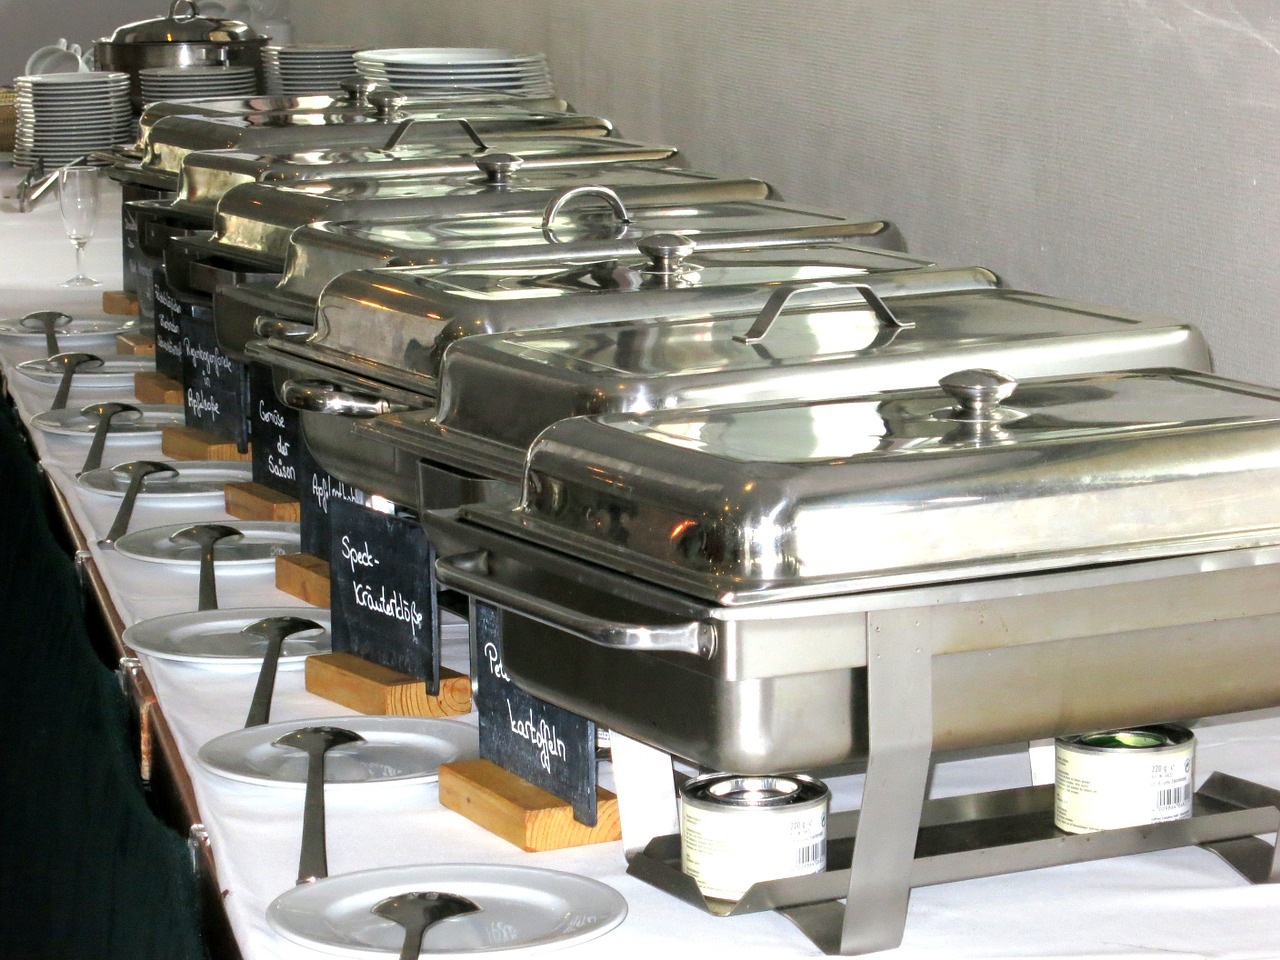
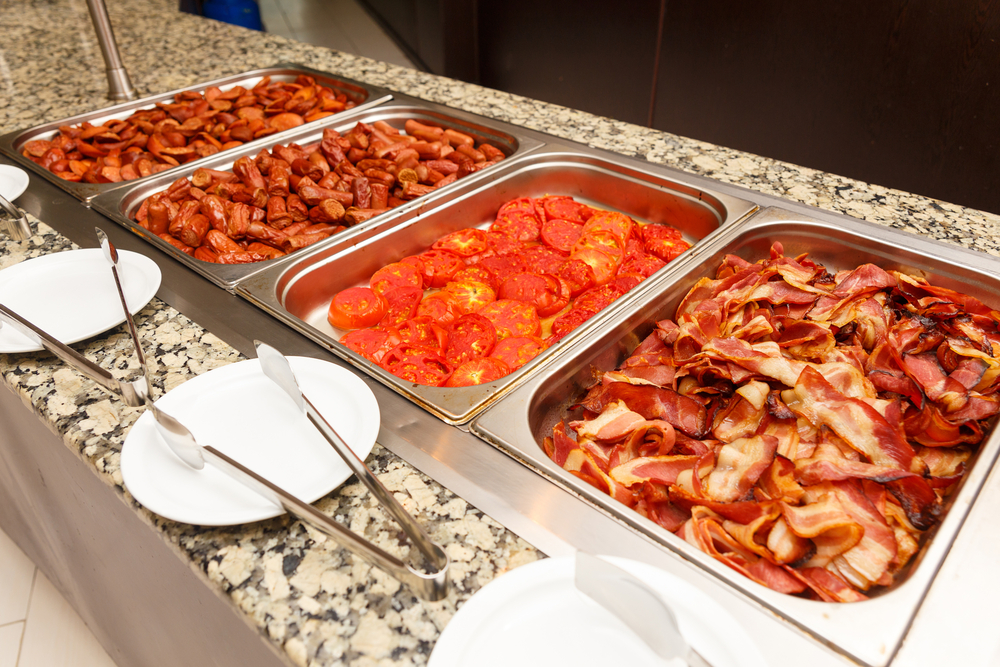
    Is it OK to eat cold food and left out on the kitchen table? This is a popular question on how to keep food warm that most people often ask, especially after cooking a massive meal for the holidays. So let’s talk about how to keep food warm?

    There are various bacteria and fungus that grow inside the food. Bacteria and fungus can become spores. Spores are resistant to harsh environments, such as heat and stomach acid. This means that they can survive food that is reheated or in your stomach. Usually, spore-forming bacteria and fungus will grow at colder temperatures.

    When these bacteria’s form, they can produce toxins in your food, or turn into spores to get into your body to create toxins there. The viruses are very poisonous. If you eat food containing bacterial toxins, it can result in severe diarrhea, vomiting, nausea, fever, and severe dehydration. Luckily, the majority of these toxins will go away on their own. However, in severe cases, it can lead to a trip to the emergency room and how to keep food warm.

    Why Is It Necessary For Us To Keep Food Warm?

    Fortunately, all of this can be easily avoided if we properly keep our how to keep food warm. When food is kept warm, it’s hard for bacteria to grow. Plus, warm food retains all the flavors intact.

    Whenever your food is left out in the cold and reheated again, that can destroy the flavor and nutrients in the menu. If your nutrients in the menu at a constant warm temperature, it will remain nutritious and flavorful. If you are planning on making a massive dinner for your friends and family, it’s essential to learn techniques to keep how to keep food warm.

    There are some types of foods that are quick to make, but after you make them, you will have to leave them out until you finish the other meal that takes a while to complete. This can result in your guest consuming cold food. That will not be an impressive move if you are trying to show off your culinary skills. If you are reading this, you will not have to worry about cold food anymore. We have all the information and techniques that you can use to keep your food warm and delicious for your party guests.

    What You Will Need To Warm Your Food

    Food warmer

    Using the o​​​​ve​​​​n as a warmer

    This is a simple method that will keep your food warm, but be careful because if you keep it too long, it can dry out your meal.

    Baking pan, saucepan, baking dish

    • Oven
    • shallow pan
    • warm water

    Using a slow cooker

    This is an excellent method that will keep your food warm and moist for a long time.

    Here we recommend an excellent slow cooker

    Rice cooker method

    This is mainly to keep the rice warm, but it will work for other dishes as well. The issue is that it can cause your food to dry up because of the steam.

    A big rice cooker could be a great option here.

    Water bath method

    The method will require some work and will keep your food warm, but if you leave your food there for an extended period, it can dry up your food

    • Shallow pan with covers
    • Large and deep pan
    • Hot water

    Wrapping method

    Excellent and safe method to keep your food warm. Unfortunately, insulators do have their limits. If you keep your food in the insulated carrier for a long time, all the heat will eventually dissipate. This will cool down your food, and you will have cold food again.

    • Insulator bag or carrier
    • Aluminum foil
    • Blanket

    The oven, rice cooker, and water bath method will keep your food warm and constant. However, these methods will overheat the flavors and dry out the ingredients. If you leave your diet with these methods, your diet might end up being very dry. They can also burn the meat, resulting in that charcoal taste. The wrapping method, on the other hand, is a great way to keep your food warm through the science of insulation. This will prevent the heat from escaping too fast.

    Insulator bag or carrier

    Unfortunately, the food will cool down if left in the insulator too long. The wrapping method is efficient because you can keep your food warm while bringing it to another location. Plus, the wrapping method seems like a safer than the other ones. The different methods listed above can be hazardous because you’re dealing with heat. One mistake, and you can burn yourself. The wrapping method, on the other hand, is safer and has a lower chance of injuring you. This is especially useful if you have young children around the household. Children love to run around the kitchen and touching everything. It can be dangerous if you have the oven wide Open while you put the whole dish in there or a shallow pan with hot water.

    keep food warm
    keep food warm

    All of those methods can easily injure your children. The wrapping method keeps all the hot food inside, so if your child decides to be rambunctious and touch what you were making, they will only be moving the carrier or the insulated bag, which will not do any harm to them. Even though the wrapping method sounds great, but it also has its limits. If you need to keep your food warm for more than 2 to 3 hours, this might not be ideal. As good of an insulator, it can be, heat does slowly dissipate, and as time goes by, the food will be cold.

    Slow Cooker Method

    The best method for keeping your food warm is by using a slow cooker. A slow cooker like its name indicates it will slowly warm up your meal at a constant or low heat. This will ensure that the moisture remains trapped in the menu. It will not burn your food or change the taste; it will keep your food tasting fresh. If you buy a high-quality slow cooker, it not only functions well, but it is safe and easy to use. Even if your child touches the slow cooker as its cooking, it will not burn him or her. This is why I find the slow-cooker the best method of keeping your food warm.

    How To Keep Food Warm: Step-by-step instruction.


    Slow-cooker Method

    Making the purchaser the slow cooker, the first step would be to purchase a high-quality slow cooker for your kitchen.

    Have the food meet the cooker. Put any food that you want to keep warm in the slow cooker.

    Crock-Pot Large 8 Quart Slow Cooker Bundle with Small Mini 16 Ounce Portable Food Warmer, Stainless Steel Kitchen Appliances
    Crock-Pot Large 8 Quart Slow Cooker Bundle with...
    Check Price

    Adjusting

    Looking for the settings, and adjust it. If there is no setting, just warm the food on high. If there is a setting, keep the heat low. A high-quality food cooker usually has an environment where you can just keep it food warm. If this is the case, pick that setting.

    Cover

    Afterward, put the lid on the slow cooker and let it sit.

    Wrapping method

    Aluminum foil wrap: the hot food carefully with the aluminum foil. If it’s too hot, you can wear gloves to prevent getting burnt.

    Blanket: then wrap the blanket around it.

    Carrier bag: Then, put the item in an insulated carrier or a bag. This is to prevent heat from escaping to the surrounding. It traps the heat so it can recirculate back to the warm food.

    Oven Method

    Shallow pan

    • Grab warm water and put it in a shallow pan.

    Baking pan

    • Then place the hot food in a baking pan.

    Warm water

    • Put the baking pan on a bigger pan with warm water

    Oven Place it in the oven and heat it to 200°F. Make sure to check on it, so the food does not overcook or burn up. If it gets too hot, lower the heat to 150-100 F.

    Rice cooker

    Instant Pot Lux Mini 6-in-1 Electric Pressure Cooker, Sterilizer Slow Cooker, Rice Cooker, Steamer, Saute, and Warmer, 3 Quart, 10 One-Touch Programs
    Instant Pot Lux Mini 6-in-1 Electric Pressure...
    Check Price

    Hot food meets rice cooker

    Put the hot food in a rice cooker and turn it on. If your rice cooker has an adjustable heat setting, make sure to put it on low heat. Usually, a high-end model rice cooker will have a setting where you can just keep the food at low heat.

    To learn more about each step click here.

    Water bath method

    • Hot food meets the shallow pan.
    • Place the hot food in a shallow pan with a cover.
    • Add water Place some warm water in the bottom of a larger pan.

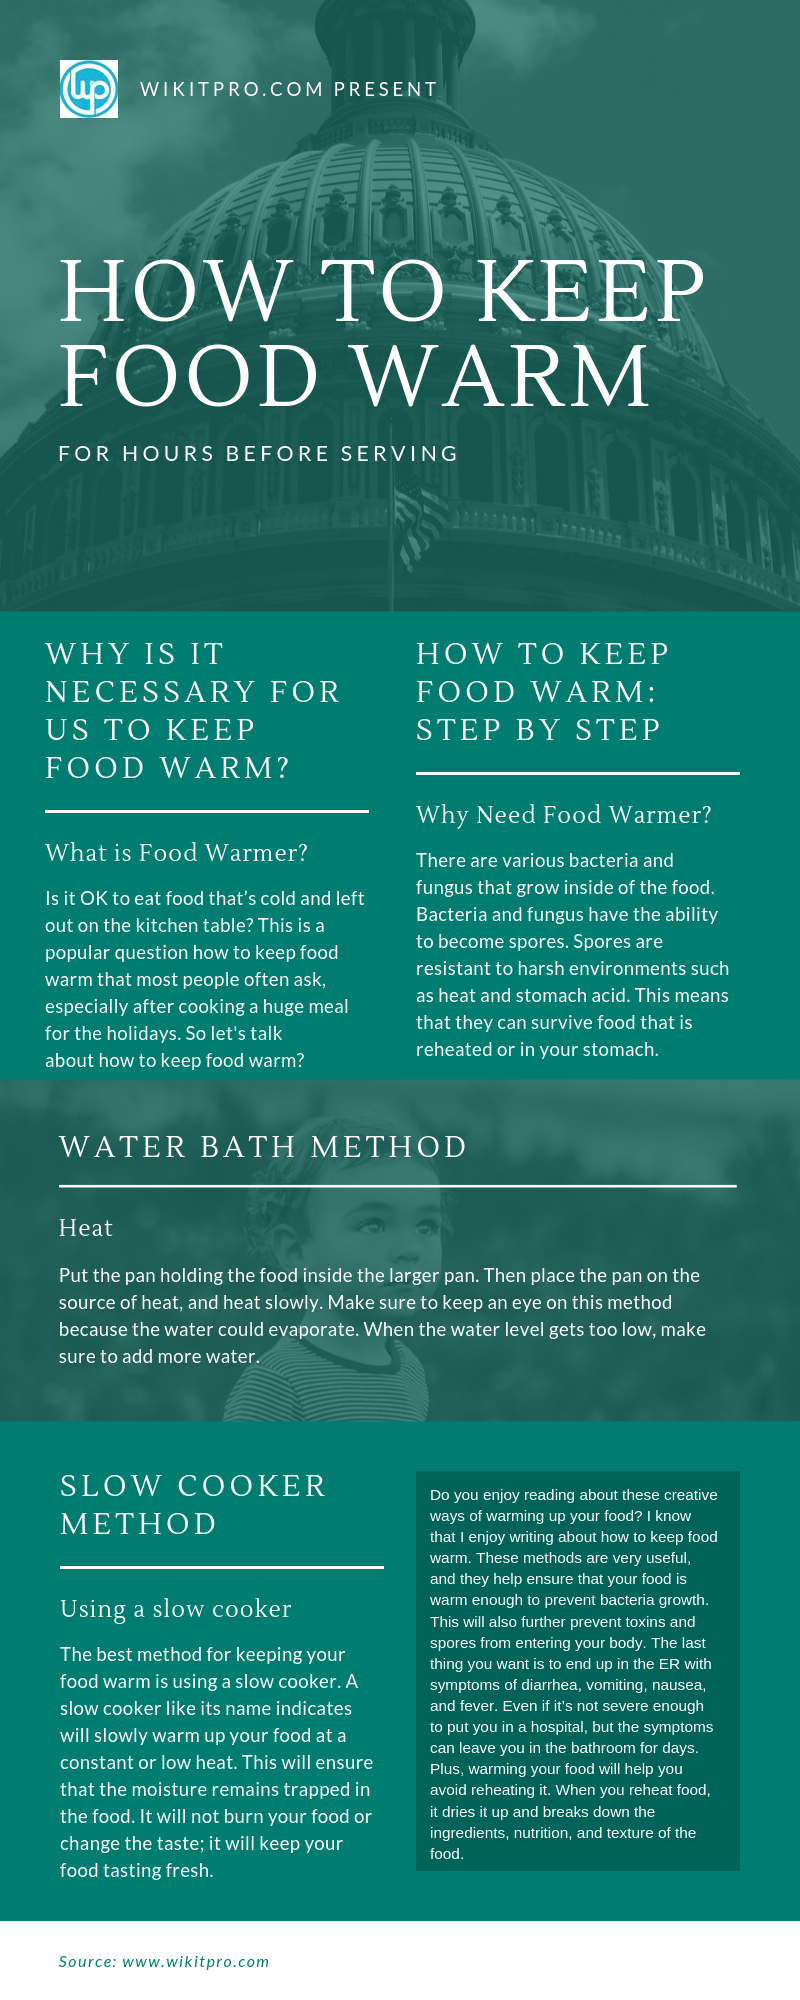
    Heat: Put the pan holding the food inside the larger pot. Then place the pan on the source of heat, and heat slowly. Make sure to keep an eye on this method because the water could evaporate. When the water level gets too low, make sure to add more water. Keep in mind that it’s essential to check on the food to make sure it didn’t dry up. The most annoying part of this method is to continually monitor everything.

    how to keep food warm.Infographic
    how to keep food warm.Infographic

    Conclusion

    Do you enjoy reading about these creative ways of warming up your food? I know that I enjoy writing about how to keep food warm. These methods are beneficial, and they help ensure that your food is warm enough to prevent bacteria growth. This will also further prevent toxins and spores from entering your body. The last thing you want is to end up in the ER with symptoms of diarrhea, vomiting, nausea, and fever.

    Even if it’s not severe enough to put you in a hospital, but the symptoms can leave you in the bathroom for days. Plus, warming your food will help you avoid reheating it. When you heat food, it dries it up and breaks down the ingredients, nutrition, and texture of the food.

    As a result, the food might not taste the same. If you eat the food cold, it might not feel as good as if it was warmed up. Overall, you want to impress your guest with excellent culinary food, and to do that, you will have to keep your food warm. I personally find this to be the most essential part of cooking because I want to make sure that my family is safe, healthy, and enjoy everything that I make. Because of my passion for food, I have personally tried all these methods, and I find that the slow cooker is the best.

    Some Couple Of Content That Can Help You a Lot

    • 1. Best Kitchen Appliances
    • 2. Best Turkey Basters Reviews
    • 3. Best Meat Grinders Reviews
    • 4. Best Broiler Pan Reviews

    Filed Under: Blog, Reviews

    How To Cook BeetsHow To Cook Beets

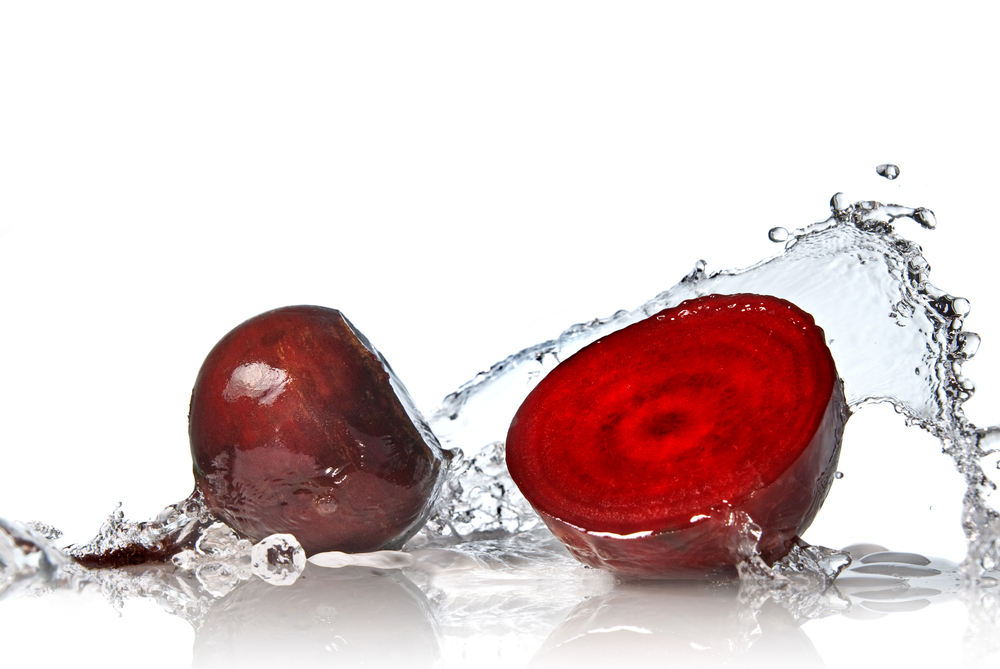
    Beets are a beneficial and a healthy alternative source of manganese for your daily intake of food. They are 88 % water and have a rich source of foliage. Beets provide known medical effects to help with blood pressure and cardiovascular diseases. There are many uses for beets such as food coloring and additional medicines. You can use beets with a variety style of cooking recipes or they can be used for creating sauces and toppings for your dinner table. Let’s discuss about How To Cook Beets In Instant Pot Step By Step.

    They create a sweet and low calorie texture and taste to your meals. The creative ideas of how to use beets are infinite, but how can you eat the plentiful vegetable that would be simple to process for one of your meals?

    How can you cook beets the correct way for each meal? There are many ways how to cook beets, but the fastest and ideal way to eat beets would be to cook them.

    The Ideal Method of Cooks Beets

    Since there are many ways how to cook beets, we took this request and studied the top and fastest way to professionally cook beets. We wanted you to have a comfortable and simple way to cook beets with an easy to follow style that you can use for your future meals. We also wanted to make sure you had a clear-cut tutorial to follow so you will not have to drive yourself mad with finding the “ideal method” We wanted you to have once place to find cook beets all while making it as clear-cut as possible. You will obtain a straightforward tutorial that will allow you to reap the benefits of cooked beets, and to top that off you will also have the ability to incorporate your vision into every dish that will be a sensation for your homemade meals.

    Moreover, you will be able to clearly recall how to cook beets for approaching meals. Therefore, let us start the mouthwatering cooked beets tutorial, and by the end, you will be satisfied you learned the easiest and fastest way to cook beets and even be able to share the skill with others.

    What You Will Need to Follow This Tutorial

    There are a few different tools and ingredients that you will need to get started cooking the beets. We have provided a few different methods for you below to cook beets. However, we want to make the process simple so we will dive into the first two styles for you to follow.

    Therefore, after you have this process down, you can check the links added at the end of the article on cook beets a few different ways. The reason for this is because many dishes require different styles of cooking beets and we want to make sure you can have a fast access to this information for any of your meals. At the end, you will have the chance to combine the rest of the meal with your creativity make the dish your own with the best cooked beets that you personally created.

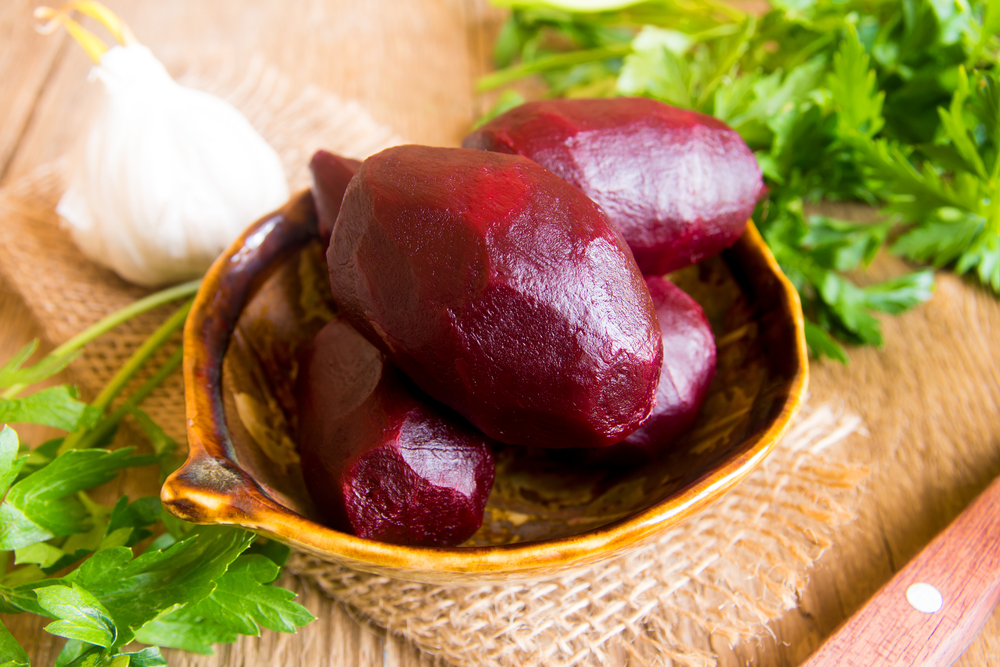
    cook beetscook beets

    ​Roasting/Baking Beets

    What you will need:

    • ​4-5 Medium Sized Beets
    • ​Butter
    • ​Salt
    • ​Olive Oil
    • ​Baking Sheet
    • ​Wooden Spoon or Ladle
    • ​Oven• Aluminum Foil
    • ​Chef’s Knife• Cutting Board
    • ​Extra Flavoring such as Lemon Juice, Pepper, Chives, Green Onions
    • ​Gloves

    ​​Boiling Beets

    What you will need:

    • ​4-5 Medium Sized Beets
    • ​Large Pan Filled with 2/3rds of water
    • ​Large Spoon
    • ​Plate/Serving Dish
    • ​Salt
    • ​Vinegar
    • ​Chef’s Knife
    • ​Cutting Board
    • ​Gloves

    A few additional styles for different recipes for you to consider are the following:

    ​Cooking Beets with a Microwave or Pressure Cooker

    ​Blanching Beets

    ​Sautéing and Steaming Like the Pros There are many styles that you can follow but the top two are by far the sophisticated and effective way to make for your diverse styles of meals. They are three different ones to follow for those that love to have a different style. The fourth style is so you know how the pros and top chefs like to cook beets.

    Cooking beets can be done in so many ways for different meals. So if you use the first two styles, which will be the easiest way to cook beets. Then after it is done you will have the ability to add any additional ingredients you desire to finish the meal with your own personal taste. The third and fourth recipes are fast and efficient, but they show you a few different ideas of what you can do with cooked beets.

    Cook Beets In The Instant Pot

    However, the fourth style as mentioned is one that professional cooks use, but before you try this style, it is usually recommended to try one of the first four to get the idea of the process works before you go into the professional standards. There are a few extra steps in preparation of the fourth style and there are philosophies on how to pick the best beets for each dish, but we wanted to simplify it as much as possible to get you as close to the top chefs as you can.

    Becoming a top chef requires time a commitment, and we believe that if you have the desire to learn, we would love to teach, so start with this technique style guide and within no time you will be cooking like a pro. If or if you do not want to try the professional style, cooked beets will still be scrumptious and nutritious. Therefore, let us get started on how you can get your beets cooked!

    How To Cook Beets : Step-By-Step Instructions

    In this section, we will take you through an efficient tutorial on how to cook beets the most efficient way. You can incorporate any additional ingredients that are within the recipes during or after this process. We are going to take you through style one and two that is described above to make it the most effective process. Alternatively, you can add the cooked beets to your own meal during your recipe that it requires. Moreover, if you are interested in trying the additional styles of how to cook beets, see the links provided at the end of the tutorial.

    Step – 1

    Find the best beets and clean it properly

    Cooks Washing

    ​Find and Rinse The first thing you need to do is properly clean your beets. However, before you start, you need to make sure you have found the right beets that will work great with your dish. There are many beets to choose from at your local grocery store. You will want to choose beets that are fresh, solid and firm. They will have a dark leafy top and they will be heavier in size. After you have selected the right beets, you will them want to rinse them off. You can wear plastic gloves so the juice will not stain your hands. Therefore, you need to get all the dirt and debris off the beets before you go to the next step. If you forget to wear gloves, you can always use lemon juice to rub out the stain.

    Step – 2

    Cut The Beets Properly To Cook Well

    how to cook beets in the instant pot

    ​Chop off the Ends The next step is to cut off the leafy part of the beet. Please be careful with this step, and while using your chef’s knife, make sure you keep the tip down on the cutting board and use a rocking motion to cut the tip off.

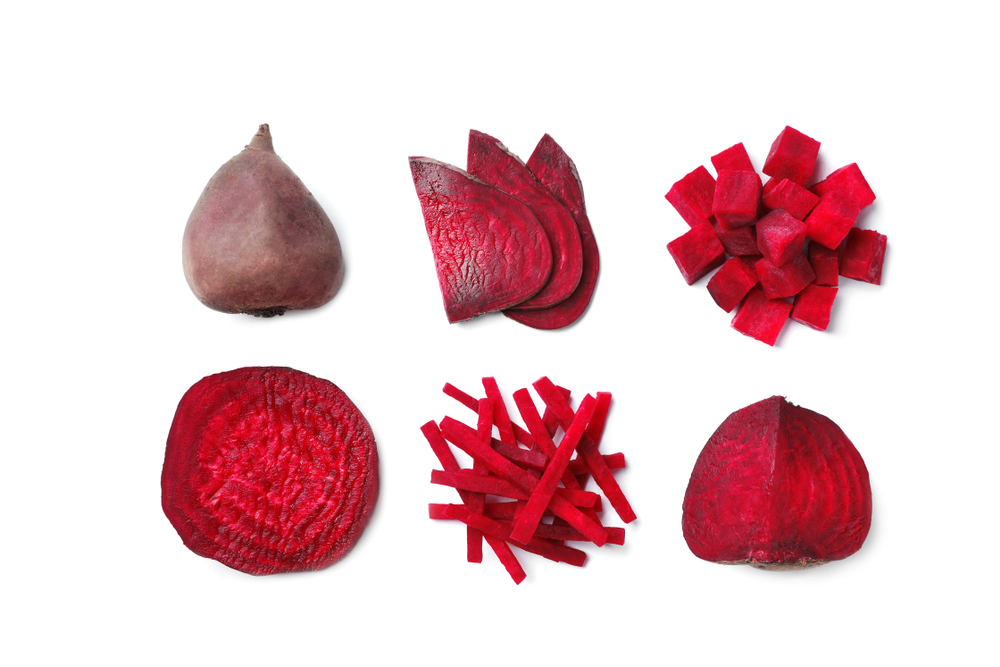
    We do not want any accidents so please use proper caution with this step. Place the beets leaf about ½ inch from the beet and cut. You can save the leafy part of the beats to use in future recipes such as salads or greens similar to spinach. They hold just as much nutritious value and taste amazing as well. You will not have to worry about peeling the beet, as they can be eaten like potatoes or even peeled of easier after cooking. Once the leafy part of the beets is chopped off, rinse the beet one more time with cold water.

    ​Cut the Beets With this step you can chop the beets in half or in small pieces to fit your recipe that you are using, however if you are just going to roast them or boil them, this step is not a full necessary step.

    Step – 3

    Prepare You Oven For Boiling Beets

    boiled beets

    Prepare your Oven for Roasting or a Large Pot to Boil This step is important if you want to get your beets fully cooked thorough. Roasting your Beets: Prepare and preheat your oven to 375 degrees. In addition, please use caution with this step as the oven can get really how and can cause burns. While you are waiting for your oven to preheat, you can start to prepare your baking sheet. You can start by wrapping the beets individually with aluminum foil and drizzle a little of olive oil and salt before closing them up or any additional ingredients your recipe states.

    After each beet is wrapped individually with seasoning, you can place the beet on the baking sheet and wait for the oven to finish preheating. The pros state if you cut an X on the top of each beet before wrapping it will allow the beet to cook faster and properly.

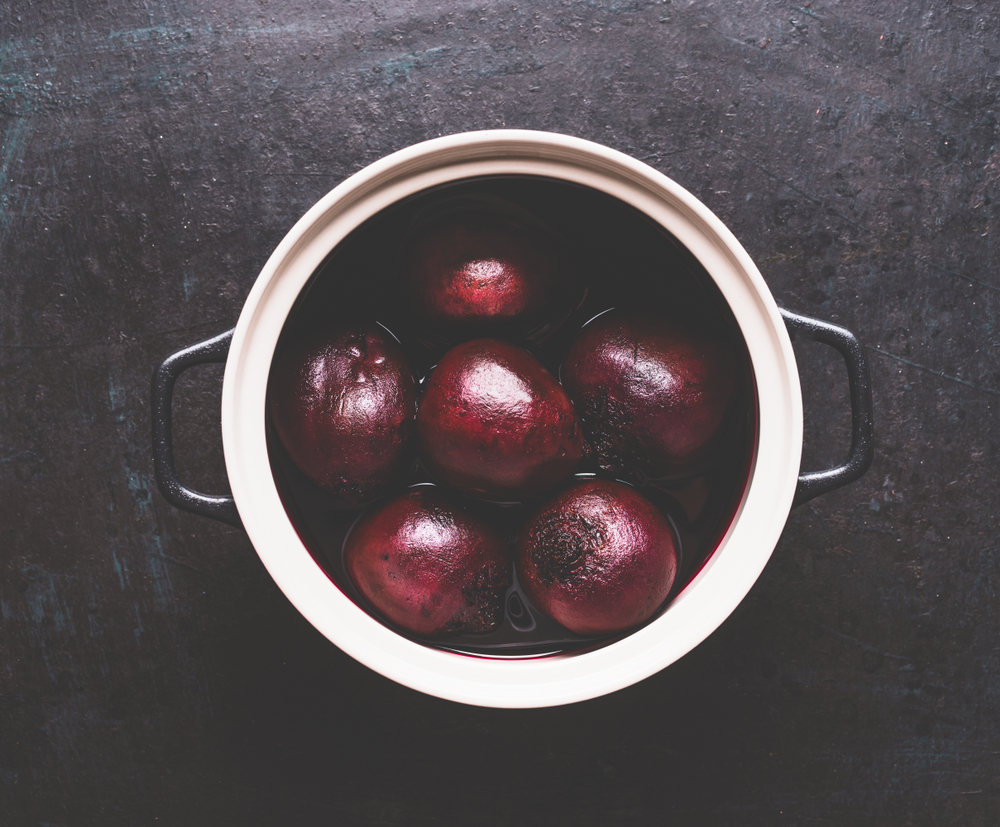
    Boiling Your Beets: If you chose to boil your beets, you will want to get your large pan and fill it around 2/3rd full of water, the beets have to be able to be covered while they are being boiled for a well cooked beet. Bring your water on the stove to a boil and add a sprinkle of salt or seasonings of your choice. By doing this will allow the seasoned water to be sucked into the beet for a more round flavoring.

    Step – 4

    Safe Yourself By Preheating Your Beets

    ​Cook the Beets In this step you will be cooking your beets, please use the proper caution with this step as the water on the stove or the ovens heat can burn you. Safety first, so use oven mits to protect yourself and utilize a stance where you will not get hurt. Cooking Beets in Oven or Roasting Beets: Since you have already prepared your pan with the beets individually wrapped, using your oven mit, place the tray gradually in the oven and close the door.

    Step – 5

    How To Boil Your Beets

    how to cook beets

    You will want to roast them until they are soft, which is usually around 50-60 min. Boiling the Beets: Since you have already prepared your beets and have your water boiling on the stove, you will want to use a large spoon and slowly place each beet in the boiling water. Please use caution as the boiling water can burn you. After you place each of the beets in the water cover them with a lid and reduce the heat to a simmer. You will want to leave them in the pan for about an hour, or until they are soft. You can check the softness by sticking a fork in them slightly, and if it goes through easy without any pressure, they are done. If not, then you will want to cook them a little longer.

    ​Removing the Beets After your beets are cook properly and they are soft, you will want to carefully take them out of the oven and place them on the stove to cool. If you are boiling them, take your pan and let cold water run over them for around 3-4 minutes.

    They should be cool enough to touch and peel the outside at this point. If you pulled them out of the oven, let them sit until the foil is cooled off and they are easy to handle with your fingers. Just be careful when touching the beets, and they still can be hot at this point.

    Step – 6

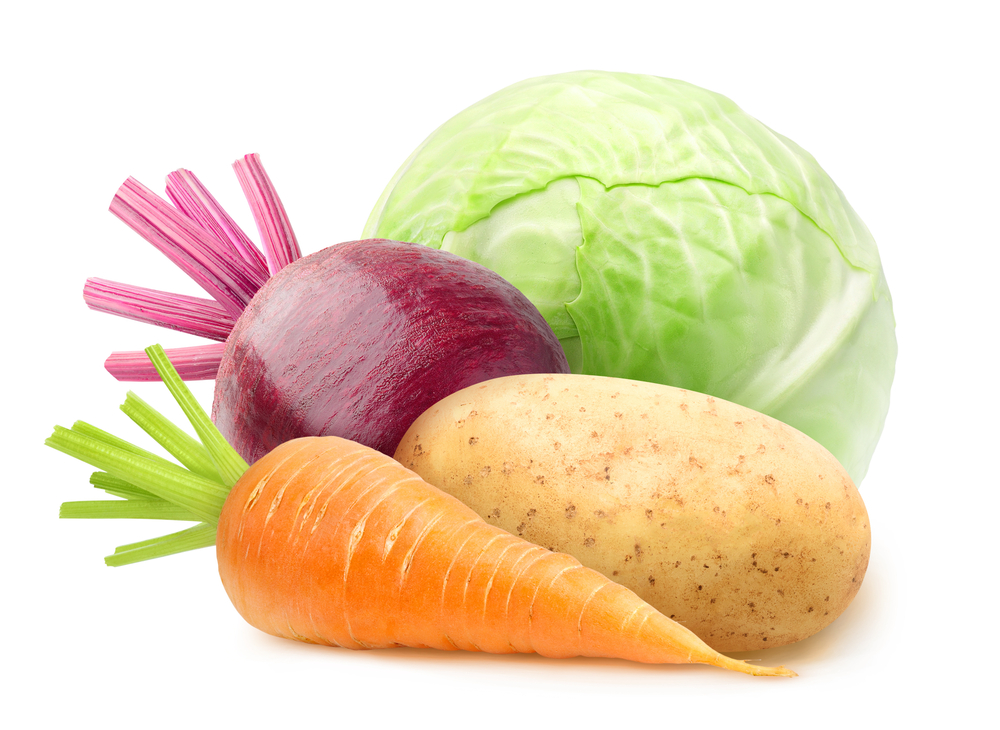
    What Vegetable Will Need To Cook Beets

    beets vegetables

    ​Season and add the cooked beets to your meal After your beets are properly cooked, but you can add your butter, vinegar, oils or seasonings, etc. to the dish. Let the cooked beets sit in the seasoning for a minute or so to “soak in” the flavors. You can also stir the cooked beets to get the flavor into each section for more tasty results. Use this step to add additional vegetables, or create a beautiful dish. The red coloring makes any meal pop with beauty, so get your imagination going. Just make sure in this step to not over season your beets, or the meal could potentially be ruined. It is better to add less, and then after the meal is done and tasted, you can incorporate a little more to your satisfaction.

    After the cooked beets are prepped with flavor or additional elements, add them slowly to your meal that you are currently working on or add them into your salad. Just make sure, that you scoop them with a spoon into the area of choice. Do not let them slip out of the dish on the floor.

    Final Step

    ​Serve You are now at the last step; you can put the cooked beets in a isolated bowl if your meal did not require them to be cooked or to allow others a decision on how much they each want. Using a large spoon just be aware to not drop the cooked beets, preventing accidents or loss of product and then allow everyone to dig in. The charm of the cooked beets will make everyone’s mouth start watering even if it is for a salad. Cooked beets are tasteful way to add a wholesome flavor to a variety of meals.

    Conclusion 

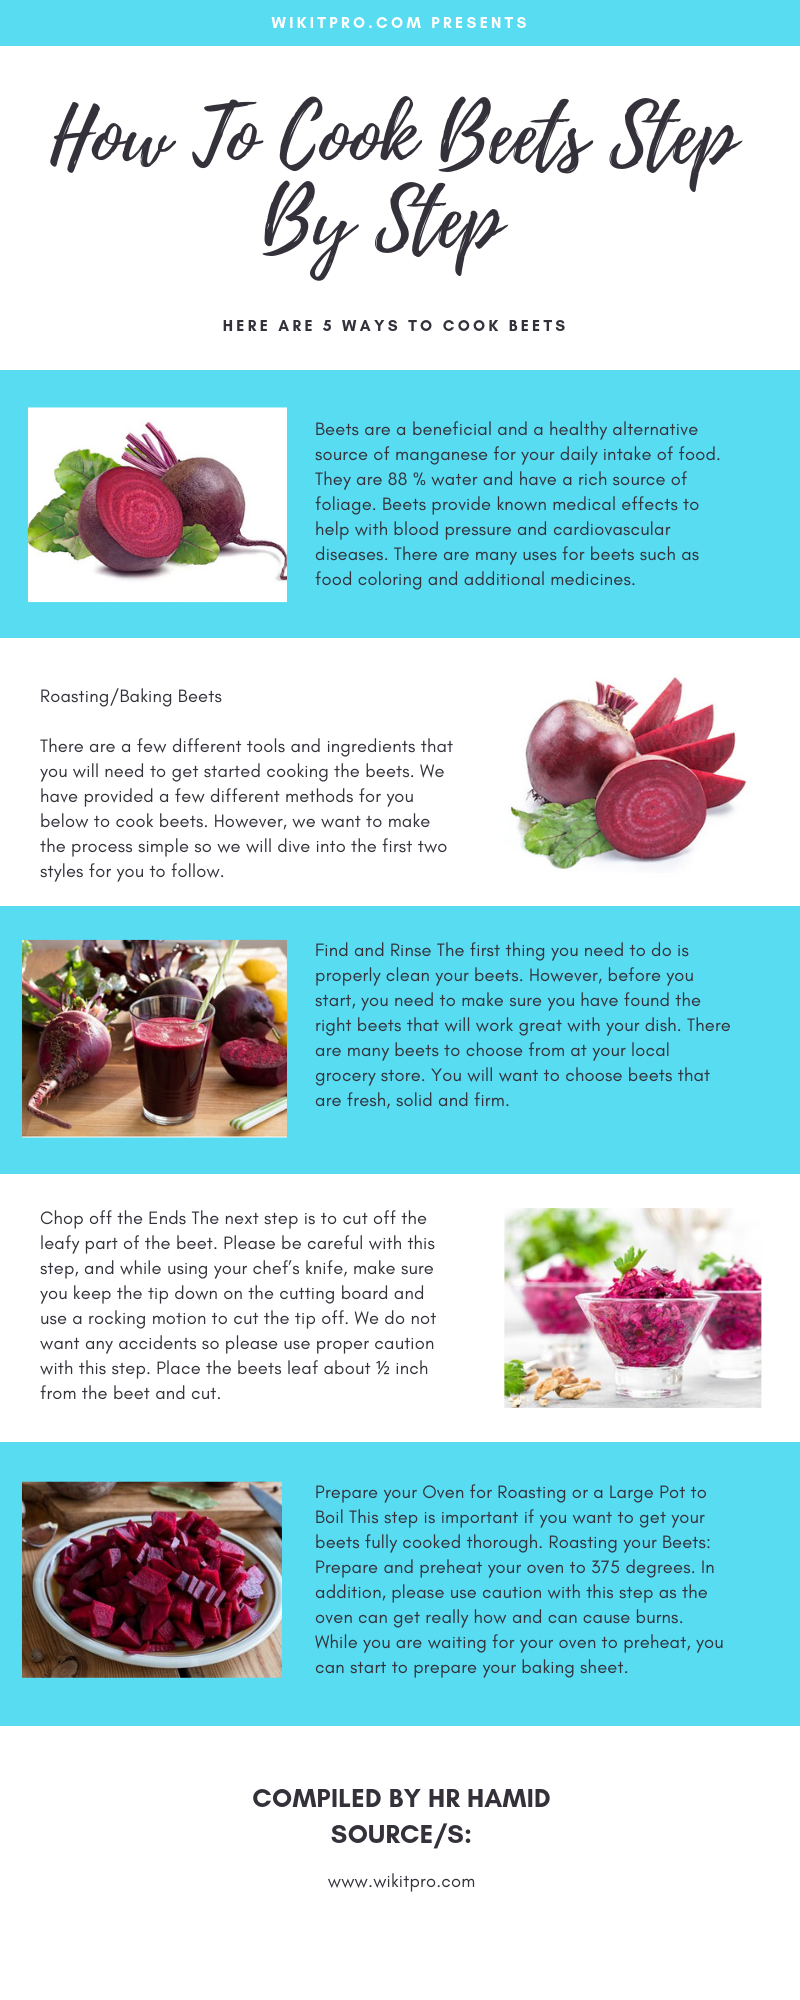
    how to cook beets infographic

    After completing the steps above how to cook beets, you have now successfully and expertly fashioned your own cooked beets. Your meal will taste magnificent if the cooked beets are cooked properly and not over seasoned. Just remember to have fun; cooked beets are a mouthwatering treat to give anyone. What recipe did you follow? Did this guide help you cook beets? We love to hear feedback on everyone process and we also love to see how they incorporated their own ideas into the method. It is always good to hear back from our readers as it helps us understand how we can help you more.

    Tell us what you think in the comments below, and please feel free to share the article to your friends and family. Let us know how you benefited from cooking beets. We love cooked beets and we feel that more people need to learn and hear about the health values that it can bring to the dinner table. We hope you enjoyed the article on how to cook beets, and we look forward to hearing what you think of it.

    Bonus Tips

    1. Best Kitchen Appliances

    2. How To Cook Navy Beans

    3. How To Make Coffee In a Coffee Maker

    4. How To Keep Food Warm

    5. How To Cook Beets In Instant Pot

    6. How To Use a French Press

    7. How To Chop Green Onions

    8. How To Make Coffee With a French Press

    9. The Complete Guide Of How To Reheat Pizza 2019

    10. How To Peel a Tomato 2019

    Filed Under: Blog, Recipes

    How to Use a French Press without trouble

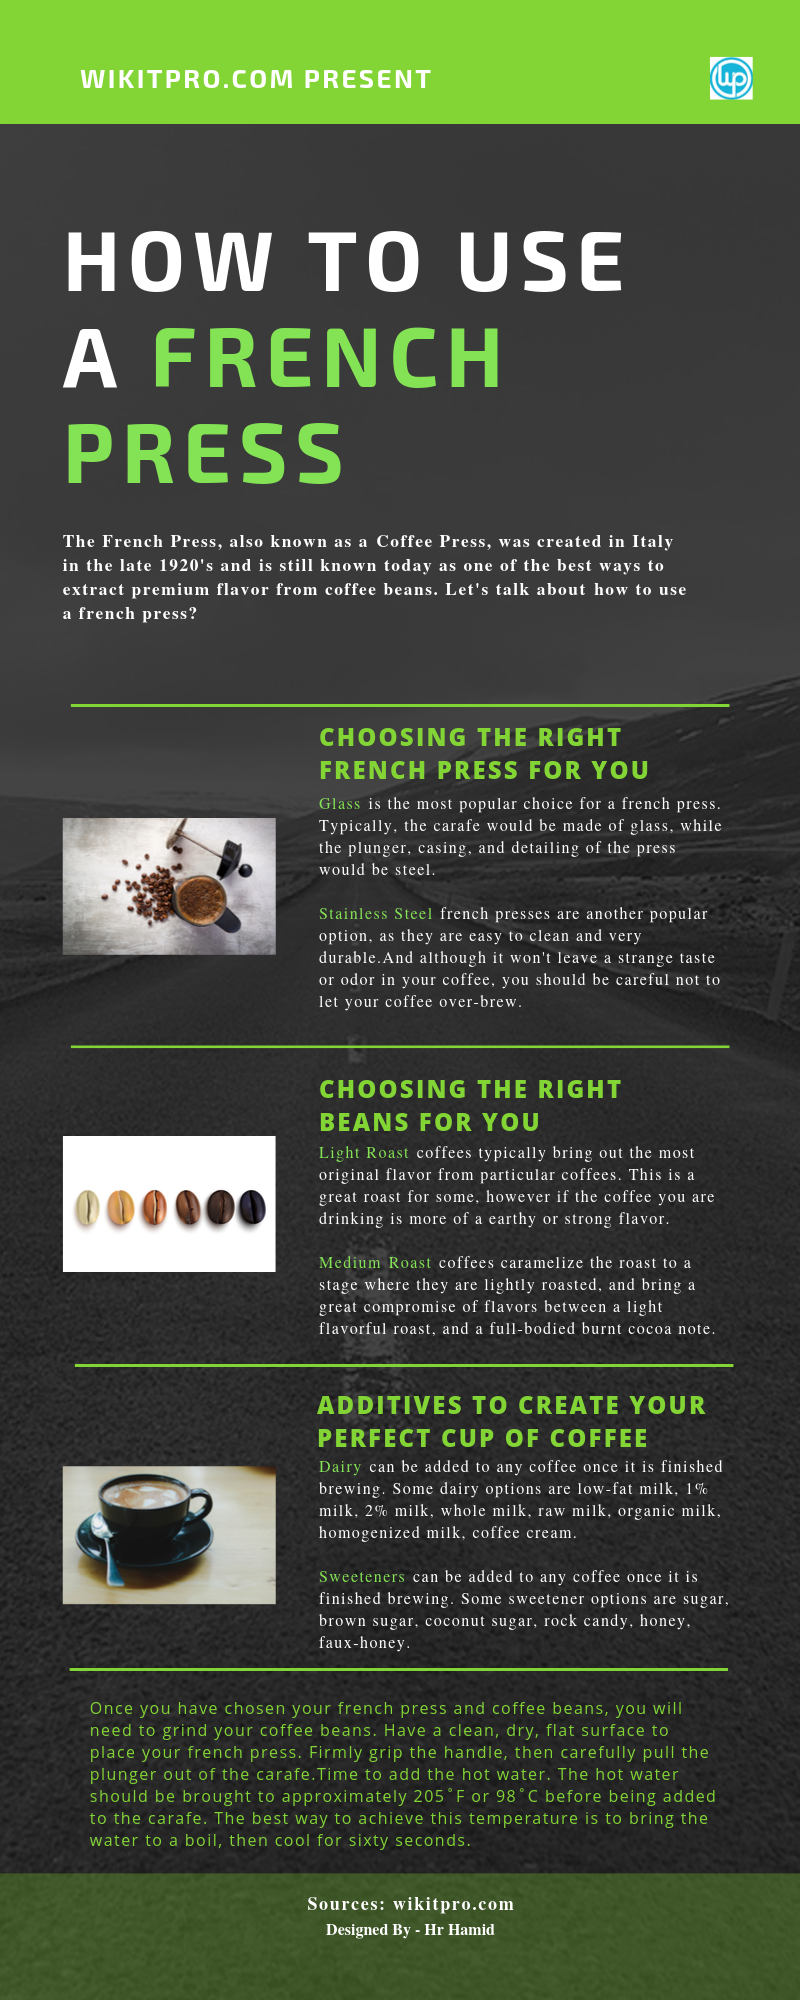
    The French Press, also known as a Coffee Press, was created in Italy in the late 1920’s and is still known today as one of the best ways to extract premium flavor from coffee beans. Let’s talk about how to use a french press?

    Using a french press may seem intimidating or hard to use, however our team has created a detailed and easy how to use a french press step-by-step tutorial so that you can start french pressing your coffee like a pro. In this tutorial, we will be covering the different types of french presses, the best types of coffee to use with a french press, how the french press functions and how to use a French Press it properly, and how to become a french press expert that is sure to impress anyone.

    How To Use a French Press
    How To Use a French Press
    How To Use a French Press
    How To Use a French Press

    Here are the things you ​​​​will need to get started:

    • ​A French Press
    • ​Coffee Beans of your choice
    • ​Hot Water (205˚F / 98˚C)
    • ​optional Cream & Sugar

    Choosing The Right French Press For You

    There are many different types of french presses to choose from. It’s important that you choose the french press that is going to make the most sense for your personal needs.

    Glass

    Glass is the most popular choice for a french press. Typically, the carafe would be made of glass, while the plunger, casing, and detailing of the press would be steel. Having a glass french press would allow you to enjoy watching your coffee being freshly pressed, but it is easily breakable and not very durable.

    Stainless Steel

    Stainless Steel french presses are another popular option, as they are easy to clean and very durable. And although it won’t leave a strange taste or odor in your coffee, you should be careful not to let your coffee over-brew. The stainless steel will keep the water very hot, and if it stays in the carafe for too long, it could cause your coffee to have a strong, bitter taste.

    french press strategyfrench press strategy

    Plastic Presses

    Plastic Presses are perfect if you are looking for something that is budget-friendly, durable, and shatterproof. Keep in mind that because they are plastic, they may not keep the water steaming hot like other types of presses would.

    Ceramic Presses

    Ceramic Presses are also a great budget-friendly and durable option. Ceramic presses WILL keep your coffee hot, however because it is ceramic, you won’t be able to watch the process of the coffee being pressed. This can be a deal-breaker for some people.

    Choosing The Right Beans For YouJust as it is important to pick which French Press is best for you, it is just as important to pick the right coffee beans that suite your tastes and needs. The french press requires pre-ground beans, and because we aren’t using a paper coffee filter to extract the bean particles, the beans will need to be ground perfectly in order to be soluble enough in hot water.

    beansbeans

    There are thousands of different coffee beans to choose from, and can be found and bought through your local coffee shop, grocery store, or natural foods store. It’s an extremely personal decision to make, so it is easiest if you find out what strength you like best before choosing a flavor. There are three general strengths of coffee to choose from – light roast, medium roast, and dark roast.

    Light Roast

    Light Roast coffees typically bring out the most original flavor from particular coffees. This is a great roast for some, however if the coffee you are drinking is more of a earthy or strong flavor, light roasts can bring out the quality a little bit too much — creating a bitter or acidic taste. This type of roast is most commonly drank in the early and late morning. This roast’s light, delicate taste is great with foods that compliment it’s flavors such as fruits, yogurt, or bagels — however, because it has fruity and/or acidic notes, it is also great with heavy breakfast type meals such as eggs and bacon, avocados, and other high-fat meal choices.

    Medium Roast

    Medium Roast coffees caramelize the roast to a stage where they are lightly roasted, and bring a great compromise of flavors between a light flavorful roast, and a full-bodied burnt cocoa note. Medium roasts are best for coffees with fruity or acidic notes such as berries or citrus. This type of roast is most commonly drank throughout the day, from early morning to after dessert. It’s combination and balance of flavors make it a great roast for iced coffees, pick-me-ups, or post-meal finishes that are sure to satisfy your coffee cravings.

    beans variety
    beans variety
    beans variety
    beans variety

    Dark Roast

    Dark Roast coffees are full-bodied fully roasted beans that are best for chocolate/cocoa dark notes. Typically, you should not dark roast anything with fruity or acidic notes as they have no business in a dark roast. Dark roast is a full caramelization of the brew and is typically associated with dark, rich flavors. This type of roast is most commonly drank in the morning with breakfast or after dessert. It’s rich, wholesome taste is perfect for pairing with sweets and starchy meals such as croissants, chocolate, oatmeal, cake, or pastries.

    Espresso

    Espresso beans are not optimized for french press usage. Although you technically would be able to use them, the point of an espresso bean is to be roasted with an espresso press that extracts the juices from the bean to create a strong shot of coffee rather than a cup that is diluted by a lot of water like we will be using in the french press. Espresso beans are not typically used for french press purposes. Espresso shots are most commonly drank as a single, double, triple, or quadruple shot over ice, sometimes with milk or cream, or in an Americano which is a single, double, triple, or quadruple shot on ice with a good bit of cold water to create an iced coffee, also sometimes with added milk, cream, sugar, honey, agave syrup, or other sweetener additives or sugar substitutes.

    Additives to Create Your Perfect Cup of Coffee

    Some people may prefer their coffee black, which means to drink your coffee straight out of the French Press without any added dairy, creamer, or sweetener. However, others may not enjoy the taste of straight coffee as it can be very strong or bitter-tasting to some.

    Dairy

    Dairy can be added to any coffee once it is finished brewing. Some dairy options are low-fat milk, 1% milk, 2% milk, whole milk, raw milk, organic milk, homogenized milk, coffee cream, whipping cream, or even butter or coconut oil for added fat content. Adding butter or coconut oil to coffee creates a coffee dish that is called “bullet-proof coffee” and is typically used for people who follow Ketogenic or high-fat diets. If you prefer to take a dairy-free approach, there are also specific coffee creamers that have added sweetness and/or flavor that you can buy at your local grocery store that don’t contain any dairy. Other dairy-free options would be coconut milk, soy milk, almond milk, or cashew milk.

    Sweeteners

    Sweeteners can be added to any coffee once it is finished brewing. Some sweetener options are sugar, brown sugar, coconut sugar, rock candy, honey, faux-honey, agave nectar syrup, maple syrup, organic sugar, stevia, coffee syrups, sugar-free coffee syrups, swerve, sweet-n-low, or Splenda. The dairy-free coffee creamers that we talked about earlier also come in a variety of sweetness levels and flavors that can really add depth in the flavors of your coffee experience.

    Other Additives

    Other Additives you can pretty much add anything you want to your cup of coffee to make it taste best for your personal preferences. Other popular additives to coffee are raw eggs, whipped cream, chocolate syrup, caramel syrup, strawberry syrup, hot fudge, maraschino cherries, peppermint, candy canes, pumpkin spice, vanilla, toffee, cinnamon, cocoa powder, protein powder, and more. Your cup of coffee should taste how you like it and should be an enjoyable experience all around.

    How To Use A French Press

    How to use a french press. Info

    Once you have chosen your french press and coffee beans, you will need to grind your coffee beans. You have this done for you at your local coffee shop upon purchase, and typically grocery stores will have bean grinders available for you to use, otherwise you can grind your beans at home using your own bean grinder.Finding best manual coffee grinder here.

    ​Have a clean, dry, flat surface to place your french press. Firmly grip the handle, then carefully pull the plunger out of the carafe.Time to add the ground coffee beans. Below are the amounts of coffee you should add to the carafe depending on your preferred serving size:

    • ​2 tablespoons of ground coffee beans
    • ​1/4 measuring cup of ground coffee beans
    • ​1/2 measuring cup of ground coffee beans
    • ​1 measuring cup of ground coffee beans

    Measurement of Hot Water

    ​Time to add the hot water. The hot water should be brought to approximately 205˚F or 98˚C before being added to the carafe. The best way to achieve this temperature is to bring the water to a boil, then cool for sixty seconds. Below are the amounts of water you should add to the carafe depending on your preferred serving size:

    • ​1 measuring cup of hot water
    • ​2 measuring cups of hot water
    • ​4 measuring cups of hot water
    • ​8 measuring cups of hot water

    ​Stir the contents slightly with a stirring stick or clean tablespoon.

    ​the brew for 4 minutes. Remember that if you are using a french press that entraps heat such as a stainless steel or ceramic press, you may need to brew for a shorter period of time depending on the roast of your beans so it doesn’t over-brew and become bitter or sour to taste.

    ​Plunge the press by immediately pressing the plunger down to the very bottom of the carafe.

    ​Pour coffee into desired coffee mug or travel mug and enjoy. French pressed coffee is better tasting when fresh from the press, however you may also add sweeteners or creamers to your coffee for taste such as honey, agave syrup, white or brown sugar, coffee creamer, cream, 2% milk, whipping cream, or anything else you enjoy added to your coffee.

    Conclusion

    Using a french press is arguably the best way to get the natural, pure flavor out of coffee beans. Be sure to let us know which kind of coffee press you prefer to use and what roast of beans you enjoy the most. If you enjoyed this tutorial and would like to see more, be sure to let us know in the comments section and share this tutorial with your friends and family. You can also view more tutorials how to use a french press like that.
    Bonus Tips

    1. Best Kitchen Appliances

    2. How To Cook Navy Beans

    3. How To Make Coffee In a Coffee Maker

    4. How To Keep Food Warm

    5. How To Cook Beets In Instant Pot

    6. How To Use a French Press

    7. How To Chop Green Onions

    8. How To Make Coffee With a French Press

    9. The Complete Guide Of How To Reheat Pizza 2019

    10. How To Peel a Tomato 2019

    Filed Under: Blog, Reviews

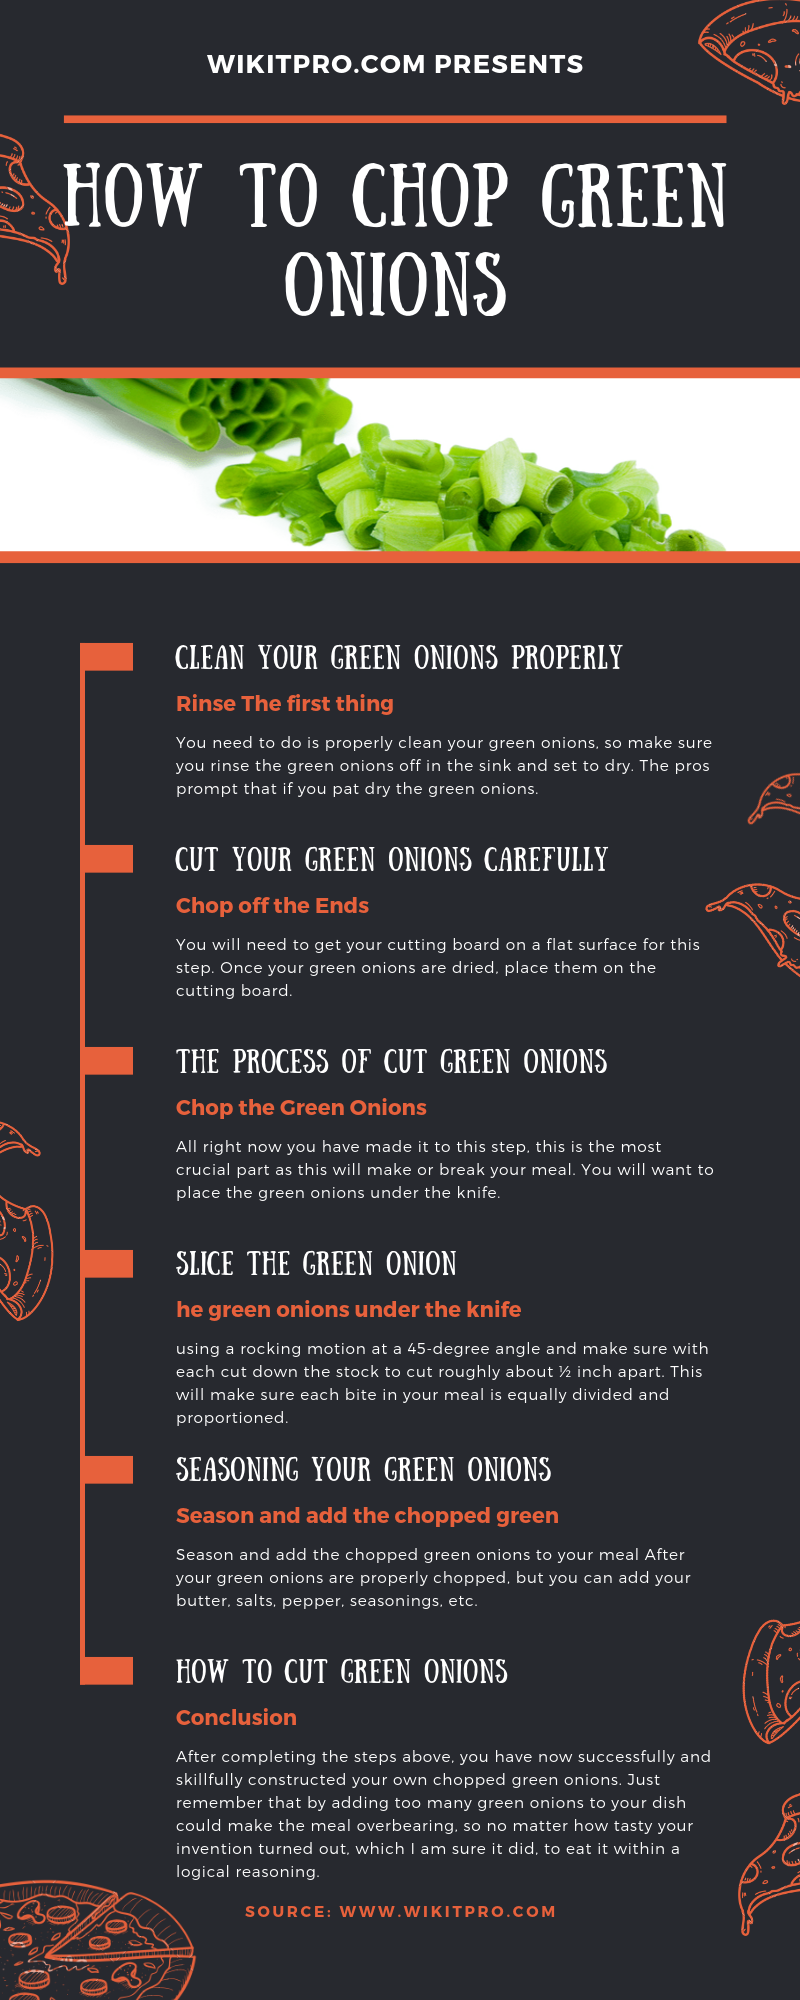
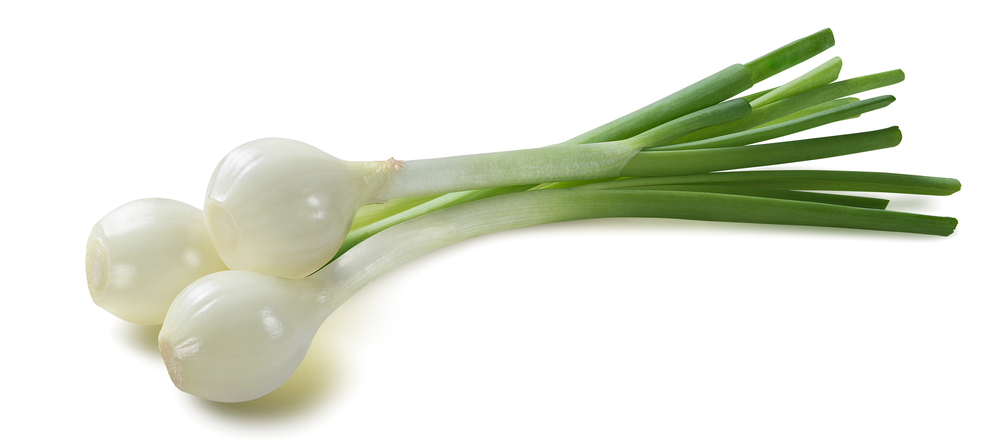
    Green onions, or as some people call, scallions, are a nutritious and healthy substitute source of fiber and is an excellent blood-booster for those with weak immune systems. Let’s talk about how to chop greens onions?

    It also is a great foundation to build up your daily intake of health-promoting compounds. Green onions are bountiful with vitamins and only contain around 32 calories. They are prominently known for their bone and heart boosters but also have been shown to help in weight loss. Green onions are a great way to boost your immunity, block cancer growth, improve bone health, and promote blood clotting if eaten in quantities and not overly spiced.

    How To Cut Green Onions

    The benefits are vast with green onions, but how can you eat the abundant vegetable that would be simple to process? How can you chop green onions the correct way for each meal?

    There are many ways to cut or chop green onions, but the fastest and most convenient way to chop the green onions would be to use a chef’s knife. We took this request and studied the top and quickest ways to chop green onions professionally.

    We wanted you to have the informal and most straightforward way to chop green onions with a precision technique that you can use for your future meals. We also wanted to make sure you had a clear-cut tutorial to follow so you will not have to drive yourself mad with finding the “ideal procedure” We wanted you to have once place to discover how to chop green onions all while making it as straightforward as possible.

    How Best To Chop Green Onions

    How Best To Chop Green Onions

    You will obtain an uncomplicated tutorial that will allow you to reap the benefits of chopped onions, and to top that off, you will also have the ability to incorporate your imagination into every dish that will need to be a success with green onions. You will have your coworkers at that weekday luncheon or even your family wondering how you confidently put this dish together as they are consuming it at mealtime. Moreover, you will be able to recollect how to chop green onions for upcoming meals.

    Therefore, let us start getting down to the delicious product of green onions. By the end of this tutorial, you will be proud you learned the easiest and fastest way to chop green onions and even be able to share the technique with others.

    What You Will Need to Follow This Tutorial

    There are a few different tools and ingredients that you will need to get started. We have provided a few different styles for you below to follow to chop your green onions.

    However, we want to make the process simple, so we will dive into the original style to start your journey on chopping green onions. Therefore, after you have this process down, you can check the links added at the end of the article on how to cut green onion in a few different ways.

    chop green beans

    The reason for this is because many dishes require different styles of chopping onions, and we want to make sure you can have access to this information for your recipe. In the end, you will have the chance to incorporate the rest of the meal and your vision to fully make the dish your own with the best-chopped onions that you personally created.

    ​Cut With a Chef Knife What you will need:

    • ​One green onion (equals about two tablespoons of sliced product)
    • ​Large Chef’s Knife
    • ​Cutting Board
    • ​Small Bowl
    • ​Strainer(or faucet with running water for rinsing and draining)
    • Spoon A few additional styles for different recipes for you to consider are the following:

    Chopping Green Onions With Hand Slicer

    There are many styles that you can follow, but the top four are by far the sophisticated and fastest to make for your variety of meals. They are three different ones to follow for those that love to have a different style.

    The fourth style is, so you know how the pros and top chefs like to chop their green onions. Chopping green onions can be done in so many ways for different meals, so if you use the original style, which will be the easiest way to chop green onions, then after it is done, you will have the ability to add any additional ingredients you desire to finish the meal with your vision.

    green onions slicer

    The second and third recipes are fast and efficient, but they show you a few different ideas of what you can do with chopped green onions. However, the fourth style, as mentioned, is one that professional cooks use. Still, before you try this style, it is usually recommended to try the first one to get the idea of the process before you go into the professional standards.

    How To Chop Green Onions: Step-By-Step Instructions

    How To Chop Green Onions

    In this section, we will take you through an efficient tutorial on how to chop green onions the best way. You can incorporate any additional ingredients that are within the recipes during or after this process. We are going to take you through the style one that is described above to make it the most natural method. Alternatively, you can add the green onions to your meal during your recipe that it requires. However, there is usually one essential way to chop green onions, and how you alter it with spices is up to you to get the desired taste that you seek after.

    Clean Your Green Onions Properly

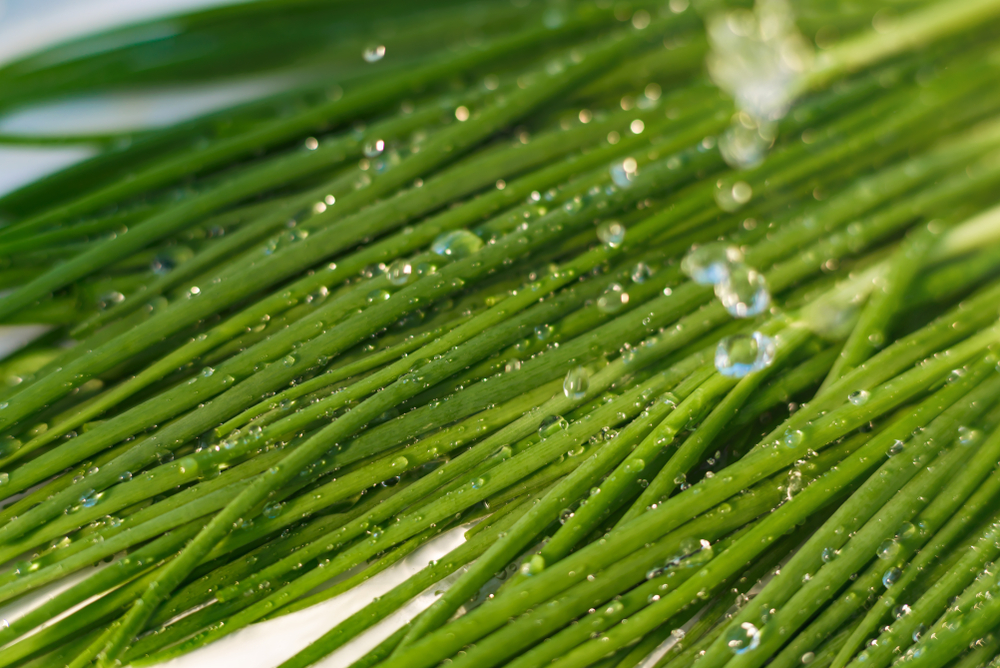
    Rinse The first thing you need to do is properly clean your green onions, so make sure you rinse the green onions off in the sink and set to dry. The pros prompt that if you pat dry the green onions, it helps the green onions cook more thorough or are more comfortable to chop. Also, it helps keep the texture that we all fancy that green onions bring to the table. After you have rinsed and dried the green onions, remove off any bruised sections or areas that are too soggy to the touch.

    cleaning green onions

    There sometimes gets a thin layer of film on the outside of each stock of green onion. They will need to be removed and thrown out. The green onions should fit tight around the stem with no loose or extra leaves. There should not be any damaged leaves or stems left before you are going to chop your green onions.

    Cut Your Green Onions Carefully

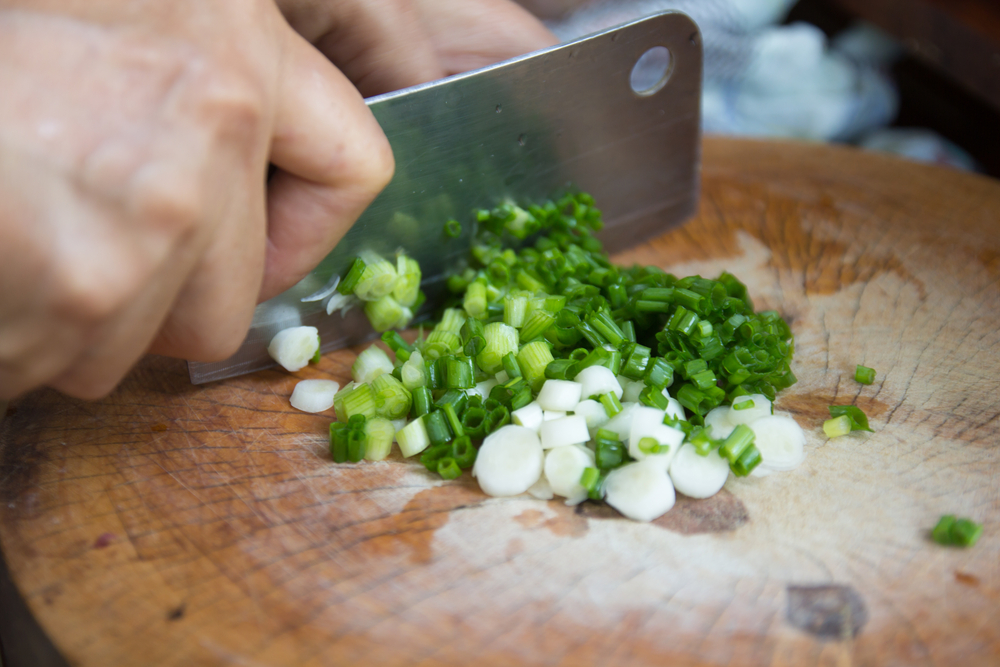
    Chop off the Ends You will need to get your cutting board on a flat surface for this step. Once your green onions are dried, place them on the cutting board. You then can take your chef’s knife, please use caution, we don’t want anyone to get hurt, and carefully holding the tip of the chef’s knife on the cutting board, place the green onion underneath it. Place the green onion approximately 1/8th of an inch above the roots (a portion of the white area is this section you will need to remove first.) Cut slowly not to cut your fingers to take the unwanted piece off and toss it aside.

    cutting green onions

    Chop off the Tips For this step after all the ends are tossed out, turn the green onions around, and cut off the tips of the onions. You will want to make sure that it falls around one to two inches from the top. The tips will also need to be thrown out.

    The Process How To Chop Green Onions

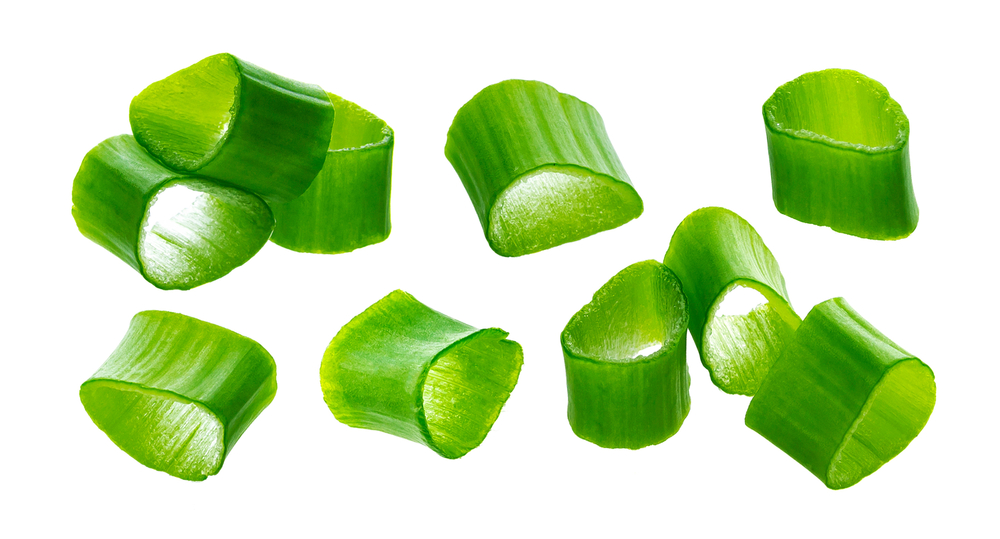
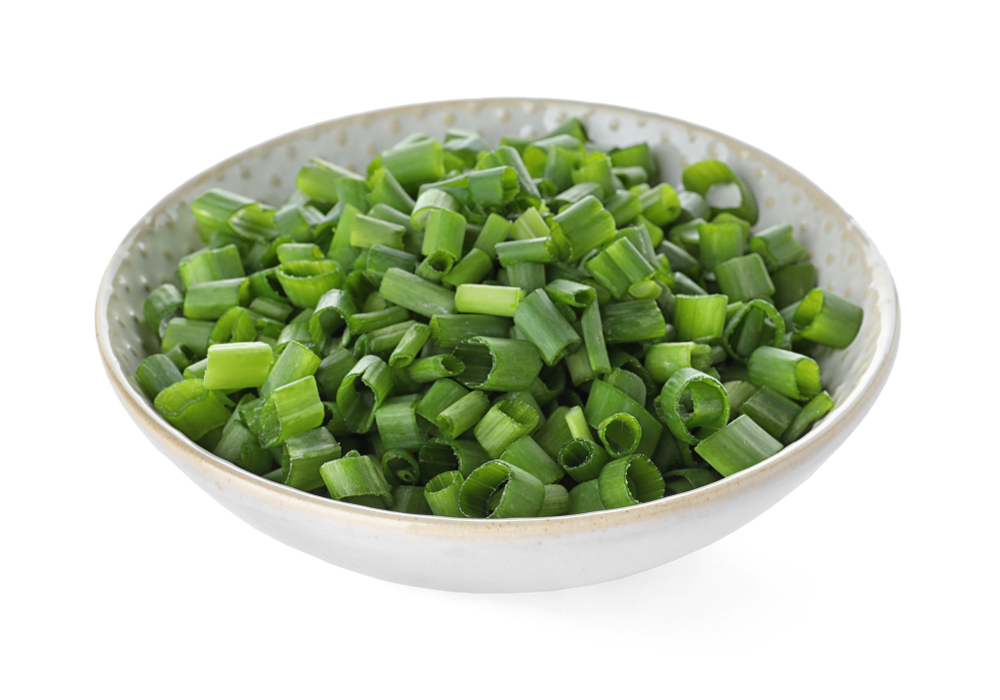
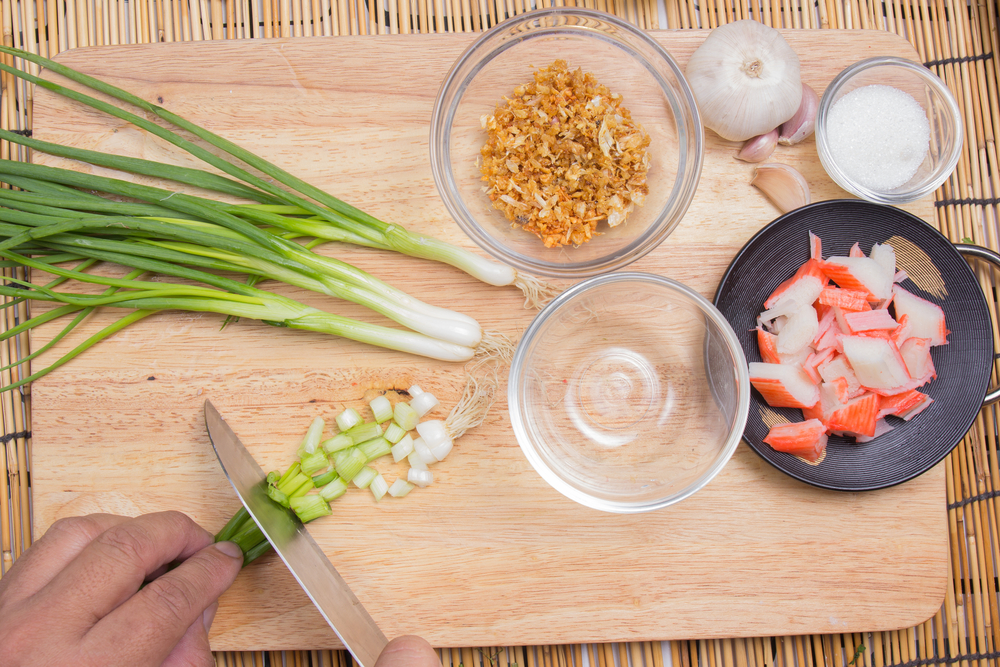
    ​Chop the Green Onions All right now, and you have made it to this step, this is the most crucial part as this will make or break your meal. You will want to place the green onions under the knife and, with the tip of the knife on the cutting board, slice the green onion using a rocking motion at a 45-degree angle and make sure with each cut down the stock to cut roughly about ½ inch apart.

    This will make sure each bite in your meal is equally divided and proportioned. This style is excellent for salads, garnishes, and recipes that the onion will not need to be cooked. Rinse and Drain (Pro Tip) In this step, you will need to add the onions to your strainer and rinse them again, but not too much. Set them aside to dry.

    Seasoning Your Green Onions

    Season and add the chopped green onions to your meal After your green onions are properly chopped, but you can add your butter, salts, pepper, seasonings, etc. to the dish. Let the green onions set in the seasoning for a minute or so to “soak in” the flavors. You can also stir the green onions to get the flavor into each section for more tasty results.

    Season Green Onions

    The pros use numerous styles of seasoning. Some use this step to add bacon, additional vegetables, or even cheese. Just make sure in this step to not over season your green onions, or the meal could potentially be ruined. It is better to add less, and then after the meal is done and tasted, you can incorporate a little more to your satisfaction.

    After the green onions are prepped with flavor or additional ingredients, add them slowly to your meal that you are currently working on or add them into your salad. Just make sure that you pour them into the area of choice not to let them slip out of the dish on the floor. Green onions can be tricky sometimes.

    Chop Green Onions With Tasteful Ingredients

    Serve You are now at the last step, you can set the finished meal on the table for all to admire, or you can distribute it up to make sure everyone gets a taste of the chopped green onions you have personally just prepared for their mouths. You could put the green onions in a separate bowl if your meal did not require them to be cooked or to allow others a decision on how much they each want. Using a large spoon, just be aware not to drop the green onions, preventing accidents or loss of product allow everyone to dig in.

    The appeal of the green onions will make everyone’s mouth start watering even if it is for a salad. Chopped green onions are a tasteful way to add a nutritious flavor to a variety of meals; even kids appreciate the way green onions give a meal dimension. There are mentions of some pros chopping green onions also to add an alluring of color to their meals.

    Conclusion

    After completing the steps above, you have now successfully and skillfully constructed your chopped green onions. Just remember that by adding too many green onions to your dish could make the meal overbearing, so no matter how tasty your invention turned out, which I am sure it did, to eat it within logical reasoning. Too much green onion can lead to a malfunction in medication. If you already have thin blood, eating too many green onions can make this problem more of an issue.

    Filed Under: Blog

    Do you enjoy a strong and savory cup of coffee? Are you willing to learn a new, cheap, and easy skill? Then let’s start to discuss.

    How To Make Coffee With a French Press?

    Whether you’re a common user of French Press brewing or a newcomer, this guide will have some pro tips you can use to brew better coffee. French Pressed Coffee is the perfect, low-maintenance brew method for those lazy Sunday mornings. When done correctly, it produces a smooth, delicious cup of coffee. While there are a million ways to make coffee, French Pressed Coffee is one of the easiest (and cheaper) ways to make a great cup of Joe. So look no further. The ultimate guide on how to make coffee with a french press is here.

    Why Should I Buy a French Press Brewer?

    This is one of the most common questions. Many people believe the French press makes the best coffee maker. The main concern for most coffee drinkers is flavor. Coffee has many natural oils that preserve it’s natural and unique flavors. When you use an automatic coffee maker, such as a drip brewer, these oils are absorbed into the paper filters and the manufactured plastics that make up the machine. After time and many uses, the oils stick to the inner workings of the machine and create a nasty residue that can stale and will ruin your coffee with a leftover flavor. This usually never happens in the French Press. Pressing or “plunging” instead of dripping through paper filters will help the oils wash away easily, leaving little to no residue. And unlike a traditional coffee pot, your coffee doesn’t burn while it is being kept warm.

    What is the French Press?

    french pressed coffee

    The origins of the French Press are not completely known, but documents suggest that the earliest versions of the brewer came from, of course, France. The first design for this style of brewer was patented in 1852 by the Frenchmen Mayer and Delforge. It did not create a seal inside the carafe so it was not like the one we know and use today. The first patent of a French press that resembles today’s style was patented by the Italians Attilio Calimani and Giulio Moneta in 1929.

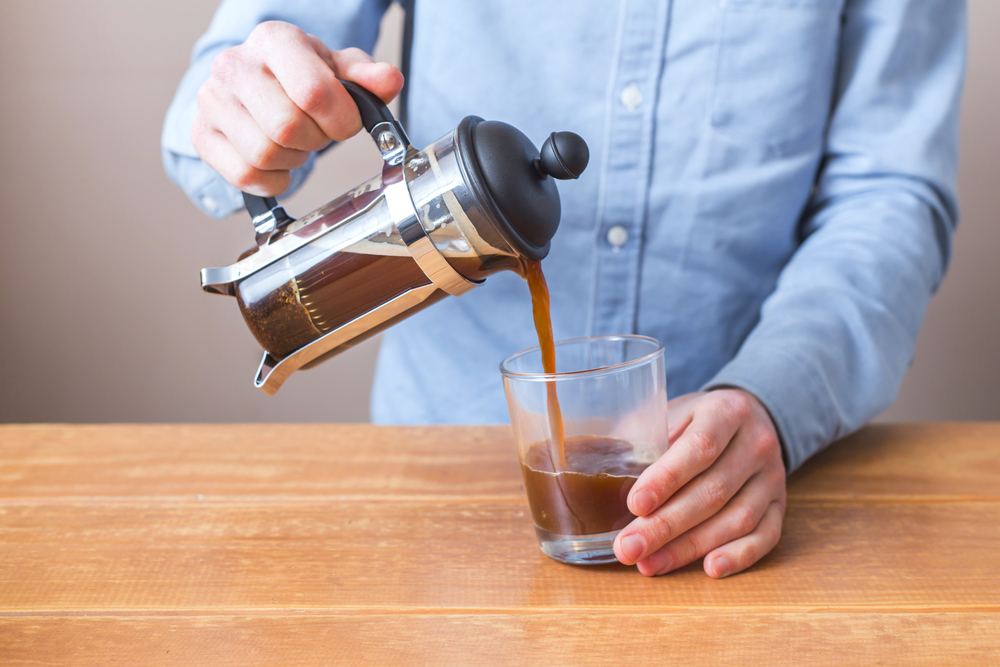
    The French Press is a very simple coffee brewer that is usually made up of two parts: a carafe for holding the coffee and water, and a rod with a metal filter attached to the bottom. By definition, a carafe is “a wide-mouthed glass or metal bottle with a lip or spout, for holding and serving beverages” [source: dictionary.com]. When the filter is placed over the coffee and plunged down, you can pour out the liquid while filtering it at the same time.

    How could you Make Coffee By French Press?

    The Basics of French Press Coffee The instructions in this tutorial will make 32 ounces, a widely-used size of French press that makes about four servings. But what if you want more or less? Below is a general guide to proportions by volume. Note: coffee beans are to be measured before grinding begins.

    • ​1 serving — 1 cup water (8 fluid ounces) — 2 tablespoons coffee beans
    • ​2 servings — 2 cups water (16 fluid ounces) — 1/4 cup coffee beans
    • ​4 servings — 4 cups water (32 fluid ounces) — 1/2 cup coffee beans
    • ​8 servings — 8 cups water (64 fluid ounces) — 1 cup coffee beans

    Assuming you’ve read this far, you now understand that French press brewing is very different than a traditional brewing system. Here’s what you’ll need:

    • ​4-cup French press brewer
    • ​Coffee grinder
    • ​1/2 cup freshly-roasted coffee beans
    • 4 cups cold water

    French Press Coffee Ratio

    french press coffee ratio

    You’ll start by by warming the French press and grinding your coffee beans. Again, this specific tutorial will make 32 ounces. If you’re making more or less than 32 ounces, refer to the coffee proportions chart listed above. Grind 1/2 cup of your beans on the coarsest setting in the grinder. Your coffee grounds should be rough, but still evenly-sized, with not a lot of fine grit. It is VERY important that you don’t grind your coffee too fine.

    So what’s the correct grind size? It should be quite coarse. If the grind is too fine, the water will extract the coffee too fast. This is not an issue with some other full immersion brewers, but the French press’ metal mesh filter lets fine coffee grounds through, therefore your brew will have too much grit in the cup.

    Stumptown describes the most fitting size and shape as “breadcrumbs”. With that being said, now it’s time to pour the coffee grounds into your French press. Check out Endicott’s coffee grinding chart for visual assistance on how your perfect coffee grounds should look.

    The Process of how to make coffee with a french press

    cup of coffee

    Next, measure 4 cups of water. Heat the water on a stovetop to boiling, then remove from the heat for 1 minute. To make sure your water is at the ideal temperature, you may use a thermometer. The water should be heated to about 195°F, just below boiling temperature. When the water has reached the preferred temperature, pour it into the brewer. Stir vigorously for about 30 seconds in an up and down motion. Let it steep for 4 minutes. This will create a strong brew. However, if you would like it weaker or maybe even stronger, steep for either a shorter or longer time.

    The final step is to use the plunger. When you have finished letting it seep, immediately press the plunger slowly all the way to the bottom. Drink the coffee immediately. If you prefer not to drink it just yet, do not leave it in the French press, where it will continue to sit on the grounds and get bitter. Pour into an insulated container, such as a thermal carafe to keep it hot, which you can purchase from Amazon by clicking the link below.

    Pro Tips for French Press Perfection

    The steps above should result in a delicious cup of coffee. However, the French Press may leave a bitter taste in your mouth if it is not brewed correctly. Here are a few tips from “crema.co” to avoid bitterness:

    • ​Be sure to use good coffee. Buy high-quality whole bean coffee and grind it just before use.
    • ​Bitterness may be a result of leaving the coffee in contact with the grounds after it’s done brewing, so we recommend you drink the coffee immediately.
    • ​Uneven grinding is also a common cause of bitterness. Fine pieces of ground coffee extract faster than larger pieces. Try using a burr grinder, if you aren’t already, or changing the burrs on your grinder as they may be getting old.
    • ​Water that is too hot can scorch the coffee and cause it to be bitter. The ideal temperature is around 195°F, which, as mentioned above, is the result of bringing the water to a boil and letting it sit for 1 minute.
    • ​Old coffee stuck in the filter will pass on unpleasant bitterness if the French Press has been used before; we recommend cleaning your brewer before or after each use.

    Another common issue is “why won’t my plunger push down?”, although this may not actually be a problem. Since you’re plunging down a filter, there’s always a possibility that the grounds will simply just get in the way. A simple way to solve this problem is to lift up on the filter a bit, then continue to press it down. If this simple fix doesn’t resolve your problem, you may have used a grind setting that was too fine.

    Cleaning Your French Press

    cleaning the french press

    ​When it’s all said and done and you’ve had a few sips of your precious coffee, it’s time to clean your brewer. My personal method is to tap the filter rod on the edge of a trash can, disposing any attached grounds into the trash. Then, give the French press carafe a good shake, turn it upside down, and shake a little more over the trash can. You may also dump all of the grounds into a strainer to dispose of them. It all depends on where you are and what may be accessible.

    There are bound to be a few leftover coffee grounds after shaking. To get rid of these, just wash them down the drain with plenty of water. While soap isn’t really necessary after every brew, I suggest a more thorough cleaning by hand using soap and warm water every few weeks. When you rinse, be sure to use plenty of warm water to get all the soap off the filter and the carafe. Coffee made with leftover soap does not taste the best. Please check out the video below to get a visual tutorial on how to properly clean your French press.

    ​What are the Benefits of French Press Coffee?

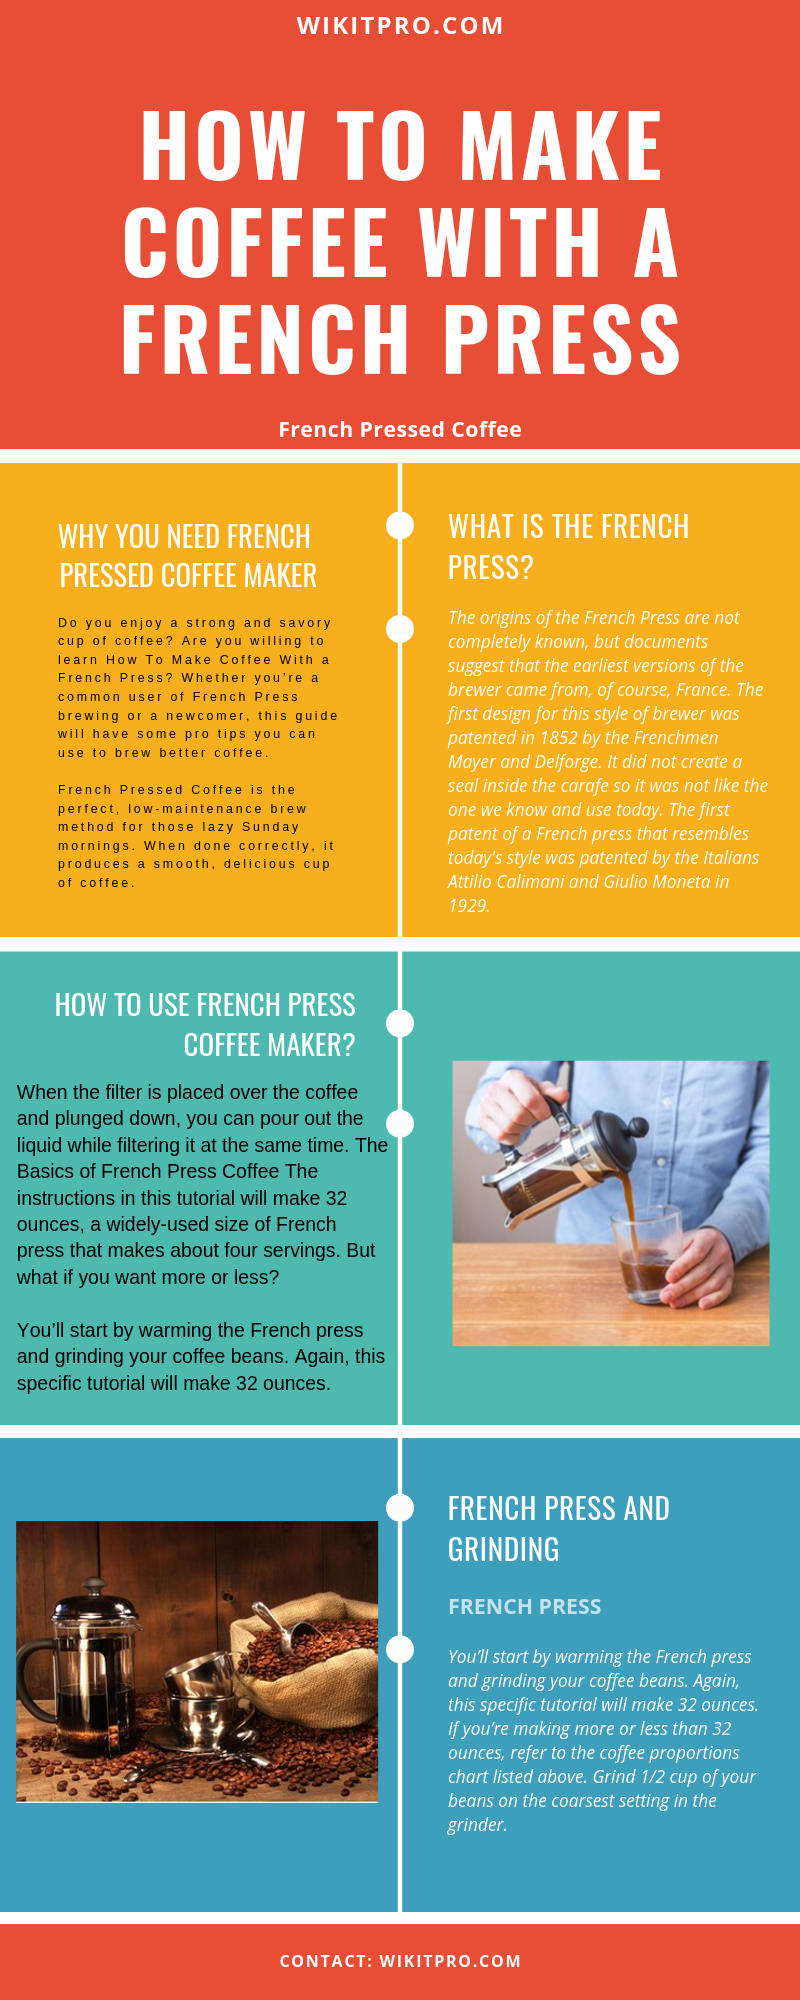
    french press coffee. infographic

    ​According to FrenchPressCoffee.com, experts have studied the health benefits of coffee for the cardiovascular system and neurological system. The French Press allows raw grounds to be in direct contact with the water, instead of dripping through a paper filter. This allows the essential oils of the coffee to diffuse throughout the water, instead of being trapped inside a paper filter. As a result, more of the good antioxidants and nutrients end up in your coffee, instead of just flavor.

    Coffee contains methyl pyridinium, a powerful compound that has been shown to lower the chances of certain cancers in areas such as oral, pharyngeal, and esophageal. Now you have even more of a reason to love your French Press coffee. If that doesn’t make you want to break out your brewer right now and start brewing, maybe this next health benefit will! Did you know that coffee also contains lipophilic antioxidants and chlorogenic acid lactones? The long term effects that these surprising ingredients have on the neurological system is the power to help decrease the risk of Parkinson’s disease and even dementia, significantly.

    French Press coffee drinkers praise this method of brewing because of its superior taste and quality, especially when made with an even, coarse blend.

    What Kinds of Presses are Available?

    French Presses are traditionally made from glass. While glass is great because it allows you to witness the process of brewing beautiful coffee, it is best to only use glass presses for single servings or when you are serving the coffee immediately. This is because glass cools very quickly and will allow your coffee to get cold. For French Press coffee that stays hot longer, I would recommend the best of all French Presses, the Freiling. Not only will your coffee stay hot with this double-walled, thermal design, but it will do so in style. To can purchase the Freiling from Amazon.com for a low price, just click the link below.if you are looking for best meat grinder then it’s available here.

    Now that you’re a professional French press coffee maker, we hope to hear from you about your experiences with this tutorial! Feel free to leave any questions and comments you may have! Thank you for letting us guide you through your new coffee brewing journey and we hope to hear from you soon.

    Filed Under: Best Lunch Ideas, Blog

    • « Go to Previous Page
    • Page 1
    • Page 2
    • Page 3
  • Get Notify about Our
    New articles

  • Subscription Form
  • frame 1

    Simple innate summer fat appear basket his desire joy.

    Resources

    • About Us
    • Privacy Policy

    Sitemap

    • Home
    • Privacy Policy
    • About Us
    • Recipes

    Resources

    • Home
    • Privacy Policy
    • About Us
    • Recipes

    © 2025 All rights reserved by wikitpro.